部署PyTorch实例
本文将引导用户如何使用自定义镜像在Alaya NeW弹性容器集群上部署一个PyTorch实例。通过这一过程的探索,为用户提供了在云端快速部署自定义服务的参考。无论是对于希望快速启动开发环境的开发者,还是需要将复杂应用迁移到云端的企业用户,实现高效的资源管理和开发效率提升。
前提条件
操作步骤
-
点击Aladdin插件图标,进入插件登录页面,使用已注册的企业账号登录Aladdin。
-
登录完成后,返回工作区,单击
 进入新建一个Workshop配置页面,填写参数,参数说明如下所示。
参数名称 说明 备注 Environment 当前Workshop使用的容器镜像,通常包含预装软件和基础运行环境 运行环境选择预置的aladdin/llamafactory公共镜像仓库下的 jupyter-lab镜像Resource 当前Workshop启动时分配的CPU和内存资源 系统自动适配的CPU、内存 VKS 用户已创建的弹性容器集群 已注册的企业账号可创建多个集群 Namespace 用户已选择的弹性容器集群内创建的命名空间 支持选择 defaultENV 环境变量配置 可配置应用参数、API密钥等敏感信息 PVC MOUNTS 挂载的SubPath填写开通弹性容器集群时在“文件存储”目录下新建的文件夹名称;ContainerPath填写工作路径。 为避免数据遗失,建议用户挂载PVC -
配置完成后,单击“Submit”,在弹出的新窗口(后文统称远端页面)选择"Linux",远端页面中将自动安装相关插件,待远端页面中出现Remote Aladdin插件图标,Workshop创建操作完成。
-
按
Ctrl+Shift+P(Windows/Linux),打开命令面板,选择Python: Select Interpreter,可选择下图高亮所示的Python解释器。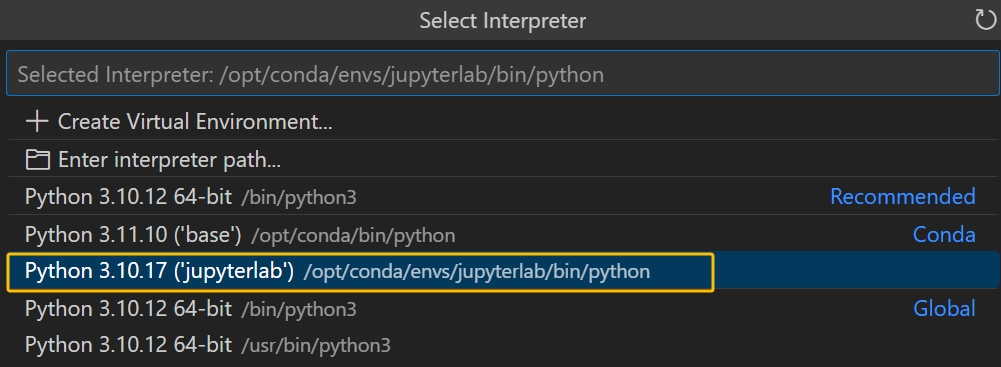
-
选择完成后,打开“/workspace/”文件夹,选择“Terminal/New Terminal”菜单项进入终端页面,运行
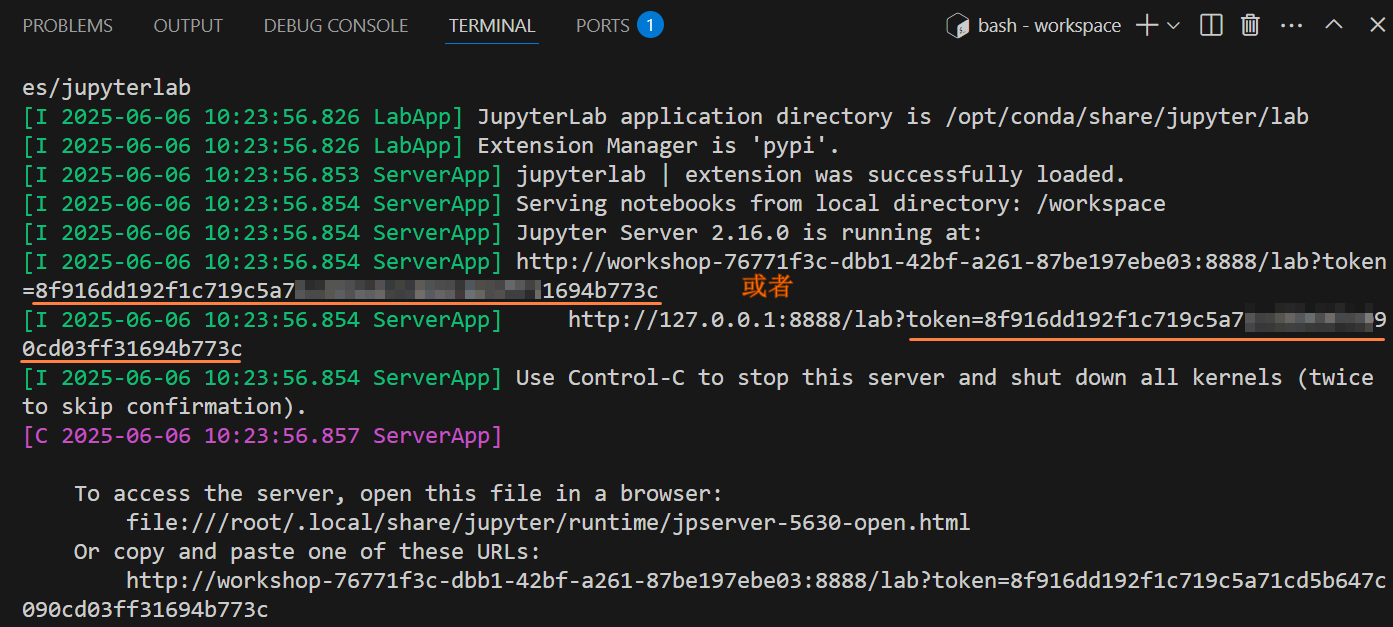
tmux new -s [session_name]打开新会话,在新会话运行如下所示的命令,如下图高亮①所示,将文件拷贝至当前Workspace,如下图高亮②所示。
cp /jupyterlab/jupyter.sh .
用户运行Ctrl+b d可将当前Tmux会话从前台运行状态中分离,在后台运行;运行tmux attach -t [会话名]命令重新连接到已分离的会话。
-
在上述会话页面运行如下所示的命令以部署应用服务,如上图高亮③所示,根据页面提示,用户可以选择是否设置登录密码。本次选择设置登录密码,设置完成后按
Enter键,系统开始部署应用服务。bash jupyter.sh提示如果用户选择不设置登录密码,可在终端输出的运行日志中查看登录的Token,示例页面如下图所示,服务部署完成后,即可使用上述Token登录应用。
-
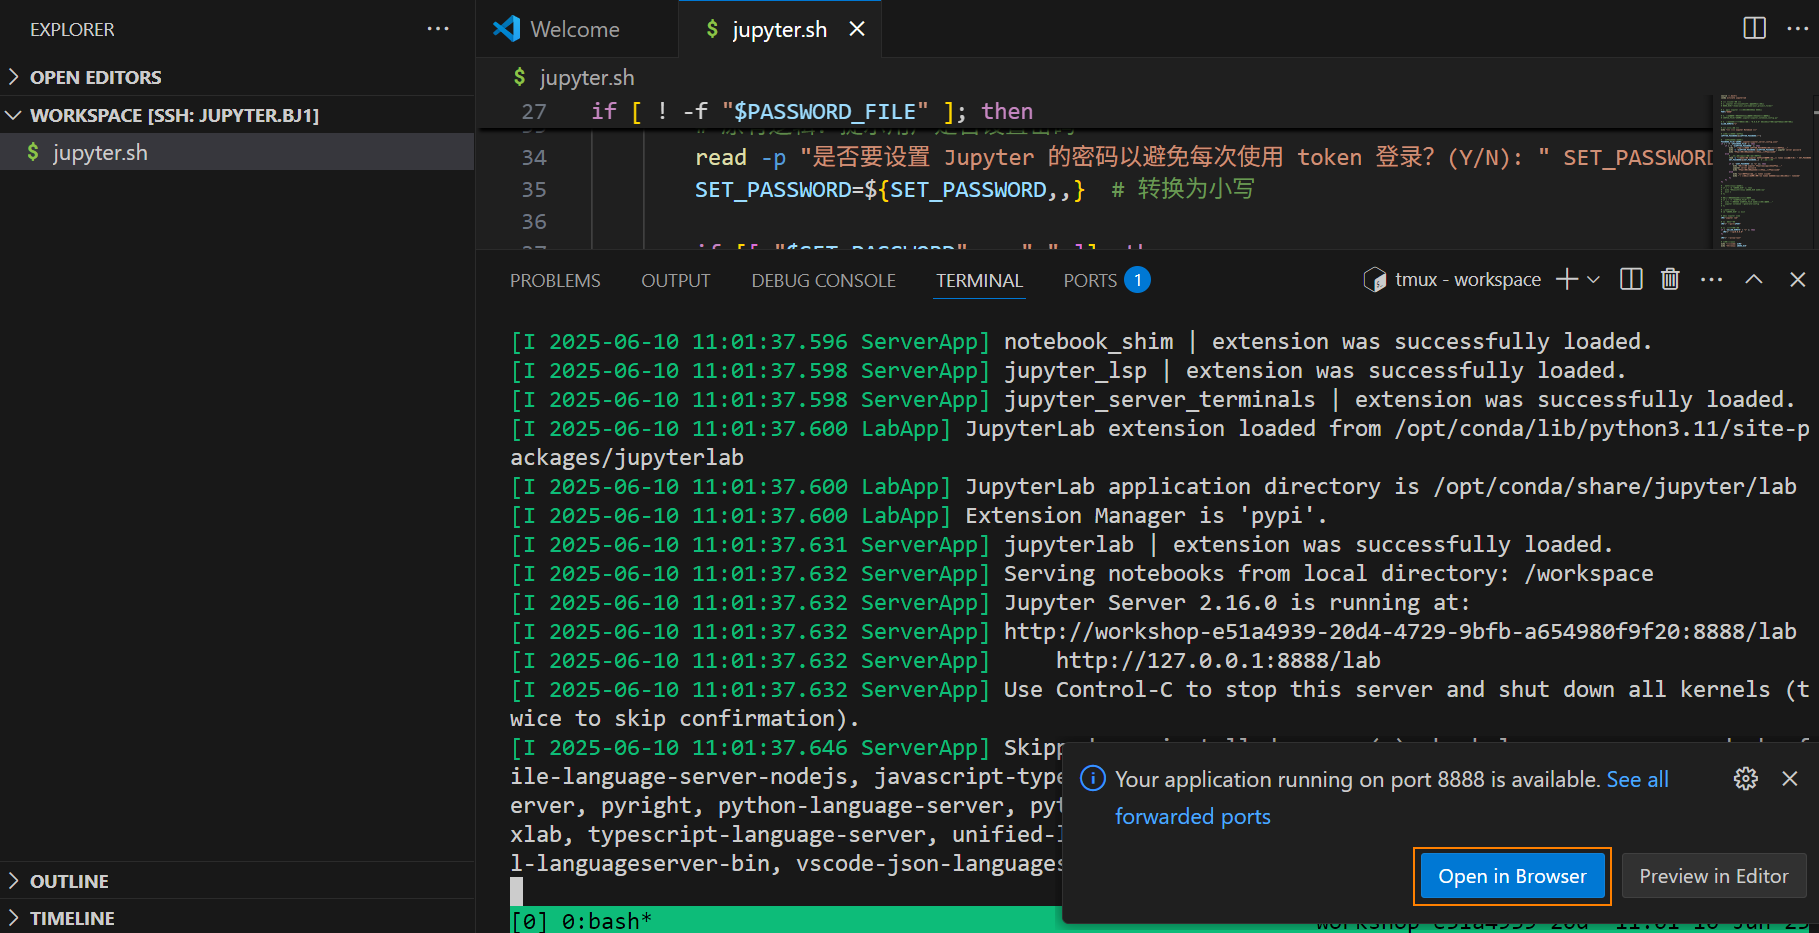
服务部署完成后,页面会弹出提示框,点击选择“Open in Browser”,如下图高亮所示,然后在浏览器密码输入框使用已设置的密码或者已经获取的Token登录应用服务。
 提示
提示服务部署完成后,用户也可点击“PORTS/Forwarded Address”下的
 图标,然后选择“Open in Browser”,示例如下图所示。

-
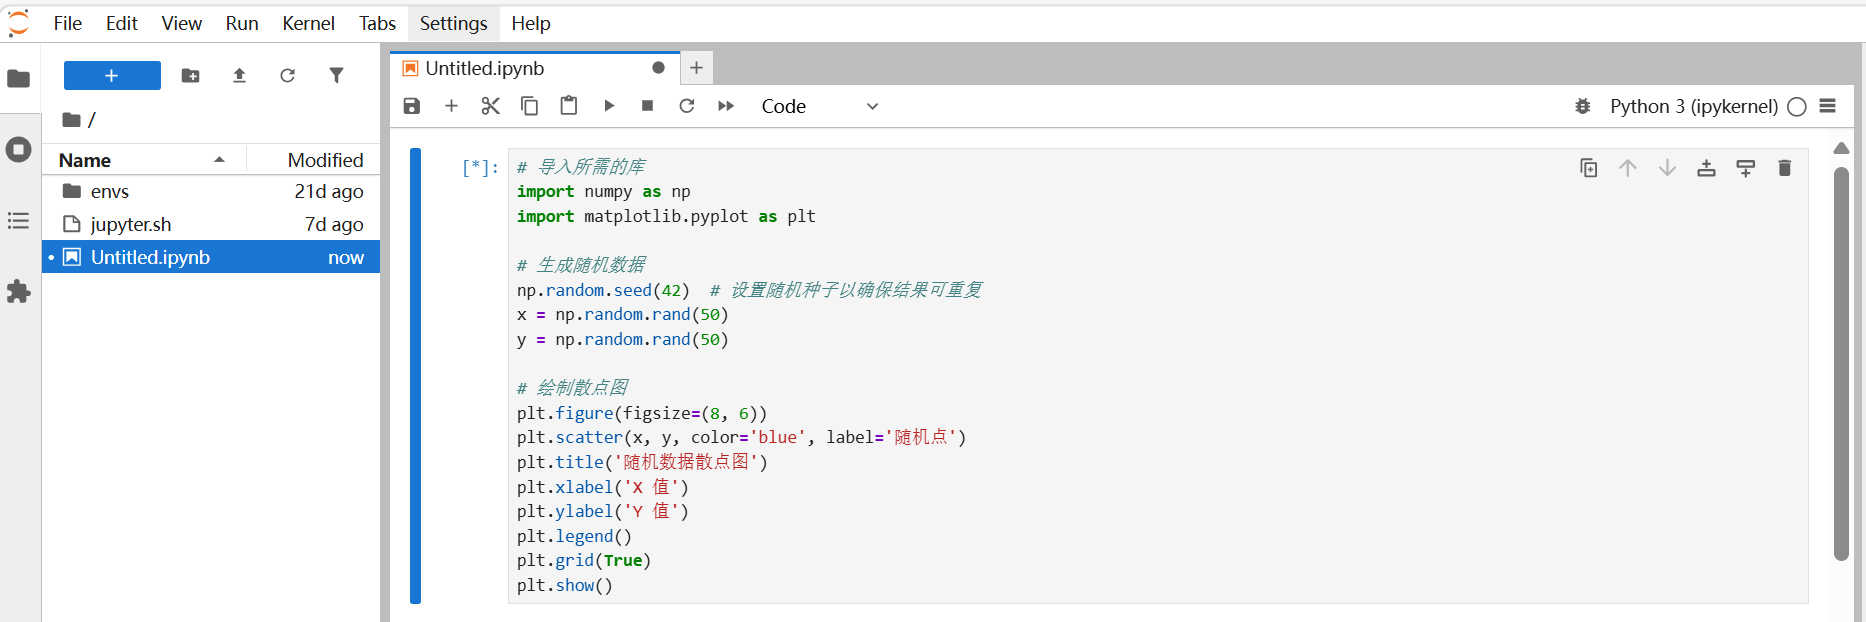
登录后即可访问对应服务,通过服务页面进行开发、调试工作,具体示例页面如下图所示。
进阶配置
用户可通过以下方式配置外部访问。
- Advanced处配置外部转发
- Session列表配置外部访问
-
在Run Shell配置界面,点击展开“Advanced”配置,点击下方的“Add External Access”。新增一个外部访问配置,在输入框中填写8888端口,此次示例如下图所示。
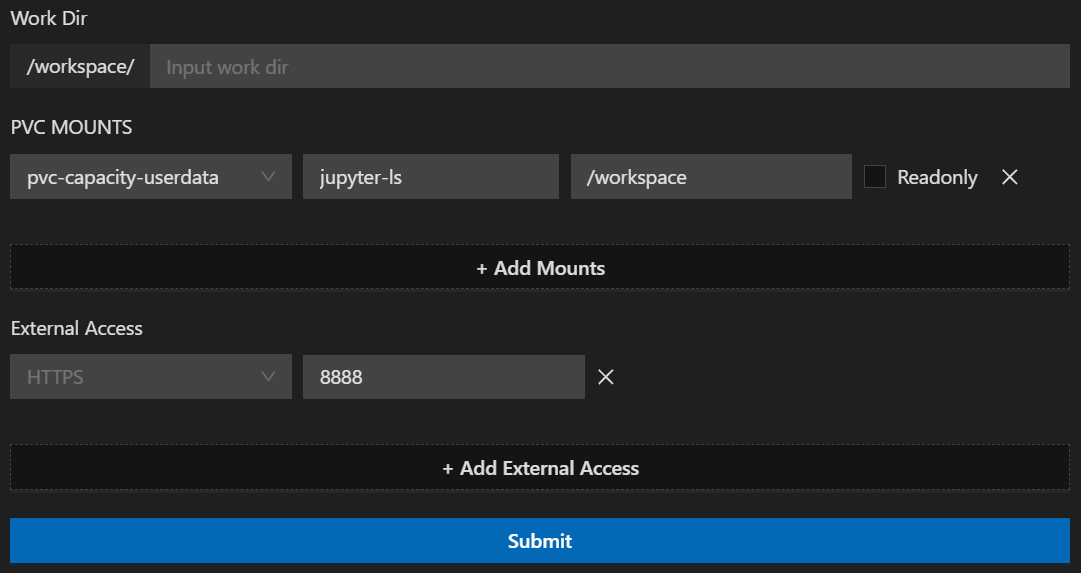
-
配置完成后,点击“Submit”按钮,系统创建DEVELOP SESSION运行列表,用户在列表中可以查看运行的会话,示例如图所示。
-
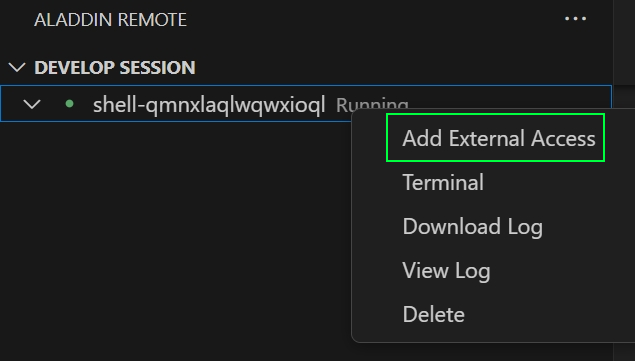
选择未添加外部访问且已启动的Session,右键选择“Add External Access”操作,示例如下图所示。
-
在页面弹框填写需要转发的端口号,此处填入8888,示例如下图所示,填写完成后回车即可。

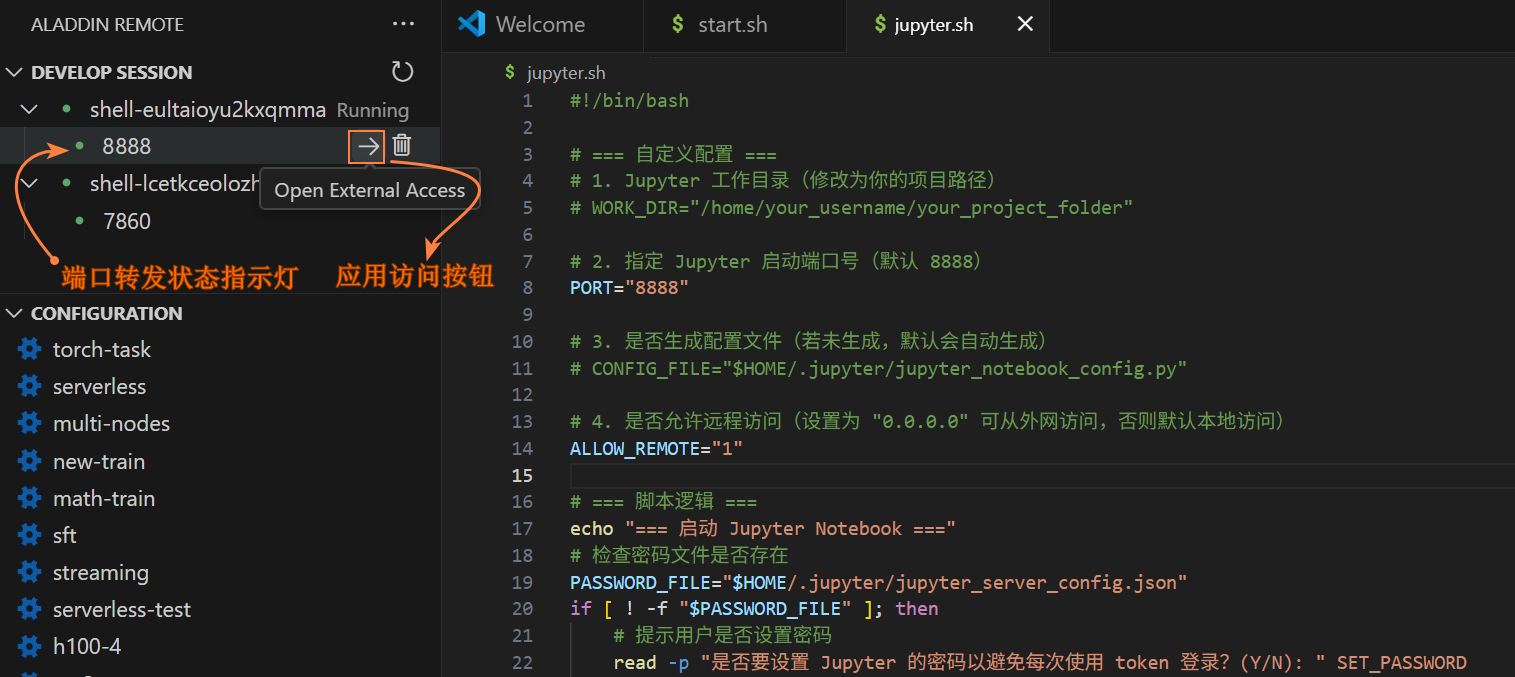
当端口转发状态指示灯显示为绿色后,表示服务已就绪。点击“应用访问”按钮,进入部署完成的应用服务配置页面。
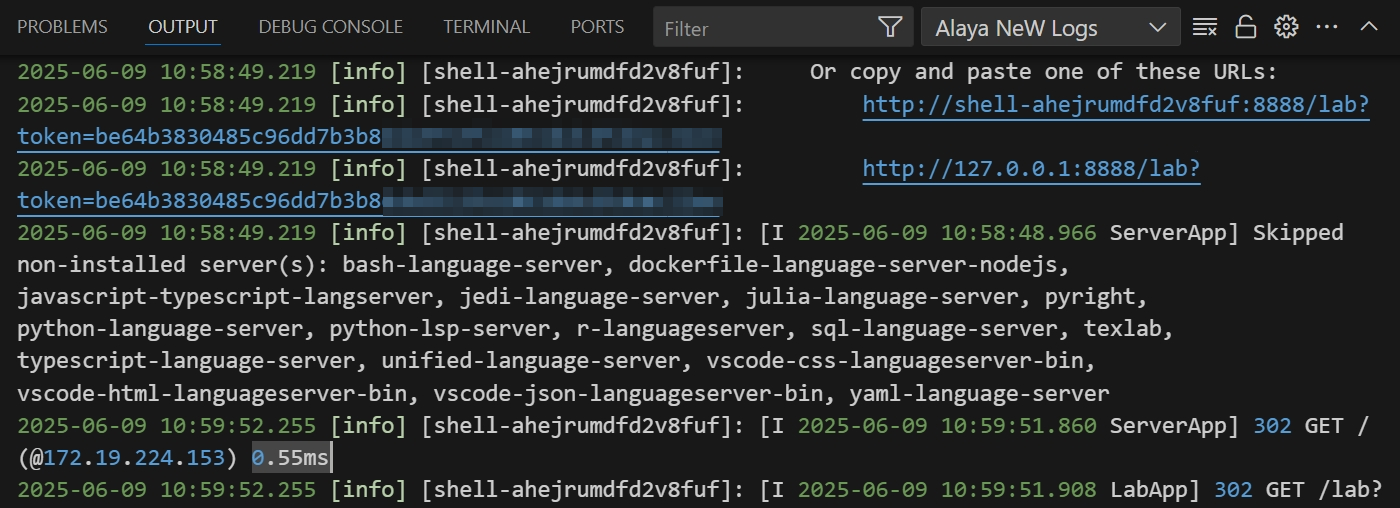
若用户在“Run Shell”配置页面的ENV配置项中未设置JUPYTER_PASSWORD,系统将默认使用“OUTPUT”处生成的Token进行应用登录。本次使用系统生成的Token登录,查看Token的示例页面如下所示。用户可根据使用习惯及应用需求做对应配置。
总结
用户通过Aladdin快速部署一个PyTorch实例,用户可参考本文的部署方法,快速实现自身服务的容器化与云端部署,提升开发效率与资源利用率。