Using PyTorch for fine-tuning in Virtual Kubernetes Services
PyTorch is an open-source machine learning library widely used in both academia and industry, particularly in fields such as natural language processing (NLP), computer vision (CV), and reinforcement learning. Pytorch is often used together with Jupyter Notebook.
In this introductory example, we will walk you through using PyTorch to fine-tune a model in Virtual Kubernetes Services (VKS).
Prerequisites
This tutorial assumes that you have:
- Installed the kubectl program on your local machine.
- Created a VKS cluster. For detailed steps, see: Create VKS.
Please make sure that VKS and the image repository that are to be used are created in the same AI Data Center (AIDC).
Tutorial Source Code
First, download the source files required for this tutorial.
File list
The list of files and their purposes for this tutorial are described below.
| File Name | Description |
|---|---|
| Dockerfile | Image build file: used to build the Docker image |
| deployment-1node-1gpu.yaml | Defines the Deployment resource: how to start and stop the Pod for a single-node, single-GPU setup |
| deployment-1node-2gpu.yaml | Defines the Deployment resource: how to start and stop the Pod for a single-node, multi-GPU setup |
| deployment-2node-2gpu.yaml | Defines the Deployment resource: how to start and stop the Pod for a multi-node, multi-GPU setup |
| llama_sft | Fine-tune example code as a folder |
The "llama_sft" fine-tuning folder contains the following files. The files along with their purposes are described below.
| File Name | Description |
|---|---|
| ds_config.json | Deepspeed configuration file |
| sft_data.json | fine-tuning dataset |
| llama_sft.py | Python script |
| llama_sft_1node_1gpu.sh | Single-node, single-GPU fine-tuning script |
| llama_sft_1node_2gpu.sh | Single-node, multi-GPU fine-tuning script |
| llama_sft_2node_2gpu_ds.sh | Multi-node, multi-GPU fine-tuning script (master) |
| llama_sft_2node_2gpu_ds2.sh | Multi-node, multi-GPU fine-tuning script |
Dockerfile
Based on the PyTorch base image, build a custom docker image by installing additional Python packages (e.g., transformers, torch, peft, jupyterlab) and setting the work directory as /workspace, among other configuration.
Deployment
In this example, the deployment information that is specified in the three files "deployment-1node-1gpu.yaml", "deployment-1node-2gpu.yaml", and "deployment-2node-2gpu.yaml", defines how to start and stop Pods for single-node single-GPU, single-node multi-GPU, and multi-node multi-GPU scenarios, respectively.
apiVersion: apps/v1
kind: Deployment
metadata:
  name: llama-deploy-1node-1gpu
  namespace: llama
spec:
  replicas: 1
  selector:
    matchLabels:
      app: llama
  template:
    metadata:
      labels:
        app: llama
    spec:
      restartPolicy: Always
      containers:
        - name: coding-dev-container
          image: registry.hd-01.alayanew.com:8443/vc-huangxs/pytorch:2.3.1-cuda12.1-cudnn8-pyton310-transformers4.41.2-devel
          resources:
            requests:
              memory: "200Gi"
              cpu: "64"
              nvidia.com/gpu-h800: 1
              rdma/rdma_shared_device_a: 1
              rdma/rdma_shared_device_b: 1
            limits:
              memory: "200Gi"
              cpu: "64"
              nvidia.com/gpu-h800: 1
              rdma/rdma_shared_device_a: 1
              rdma/rdma_shared_device_b: 1
          command: ["sh", "-c", "tail -f /dev/null"]
          volumeMounts:
            - name: workspace
              mountPath: "/workspace"
              subPath: "pytorch/workspace"
          env:
            - name: NCCL_IB_DISABLE
              value: "0"
            - name: NCCL_SOCKET_IFNAME
              value: "eth0"
            - name: NCCL_IB_HCA
              value: "ib7s"
      imagePullSecrets:
        - name: harbor-secret
      volumes:
        - name: workspace
          persistentVolumeClaim:
            claimName: pvc-capacity-userdata
This manifest instructs the Kubernetes control plane of the VKS to do the following:
- Ensure that only one Pod run at any given time. This is defined by the "spec.replicas" key-value pair in the manifest.
- Reserve GPU, CPU, and memory resources on the compute node where the Pod runs. Each Pod in the Kubernetes cluster is allocated one GPU, as specified by the "spec.template.spec.containers.resources.limits.nvidia.com/gpu-h800" key-value pair.
- Specify the image, as defined by the "spec.template.spec.containers.image" key-value pair.
- Specify the mount directory of the PVC, as defined by the "spec.template.spec.containers.volumeMounts" key-value pair.
- Specify the PVC itself, as defined under "spec.template.spec.volumes".
When preparing the "jupyter_deploy.yaml" file, replace the following information with your own:
| Variable Name | Description | Source | Example |
|---|---|---|---|
| image | Image name | Custom image | registry.hd-01.alayanew.com:8443/[user]/pytorch:2.3.1-cuda12.1-cudnn8-devel |
| resources.requests.[GPU] | GPU resource info | VKS | nvidia.com/gpu-h800 |
Procedure
Prepare the image
Make sure that the image repository and the VKS cluster are created in the same AIDC.
In the commands below, replace the Dockerfile path, Harbor account/password, image name, and image repository address with your own values.
USERNAME/PASSWORD: See the SMS notification you received when the image repository was created.
IMAGE_REGISTRY_DOMAIN: See Using the Image Repository.
IMAGE_REGISTRY_URL: With format "IMAGE_REGISTRY_DOMAIN/project".
# pull image
docker pull pytorch/pytorch:2.3.1-cuda12.1-cudnn8-devel

# build image
docker build -t pytorch:2.3.1-cuda12.1-cudnn8-pyton310-transformers4.41.2-devel -f /path/to/Dockerfile .

# login
docker login  IMAGE_REGISTRY_DOMAIN -u USERNAME -p PASSWORD

# tag
docker tag \
  pytorch:2.3.1-cuda12.1-cudnn8-pyton310-transformers4.41.2-devel \
  IMAGE_REGISTRY_URL/pytorch:2.3.1-cuda12.1-cudnn8-pyton310-transformers4.41.2-devel

# push
docker push IMAGE_REGISTRY_URL/pytorch:2.3.1-cuda12.1-cudnn8-pyton310-transformers4.41.2-devel
Create basic Kubernetes resources
In the commands below, replace the account, password, image name, and image_registry_url with your own.
# Specify VKS configuration
export KUBECONFIG="[/path/to/kubeconfig]"

# Create namespace
kubectl create namespace llama

# Create secret
kubectl create secret docker-registry harbor-secret \
  --docker-server=registry.hd-01.alayanew.com:8443\
  --docker-username="user"  \
  --docker-password="password" \
  --docker-email="email" \
  --namespace llama
Single-Node, single-GPU Fine-Tuning
Create the Deployment
kubectl create -f deployment-1node-1gpu.yaml
kubectl get all -n llama

Prepare the scripts
On the host machine, run the following command to copy the fine-tuning scripts to the persistent directory. In this tutorial, the script directory is "/workspace/llama_sft".
kubectl cp [/path/to/llama_sft] pod/llama-deploy-1node-1gpu-6d77656b9f-bxfbc:/workspace/llama_sft
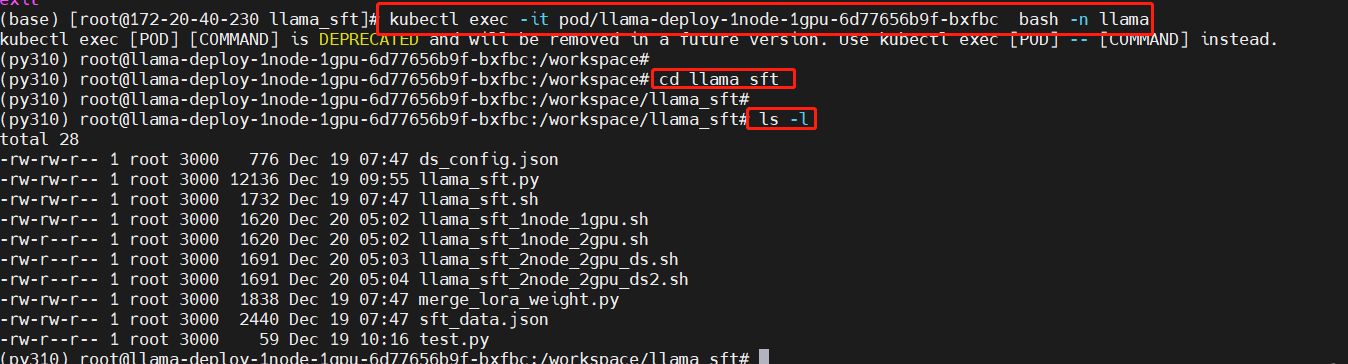
Enter the working directory in the Pod
Replace the Pod name with the actual name of the Pod you created.
kubectl exec -it pod/llama-deploy-1node-1gpu-6d77656b9f-bxfbc  bash -n llama

cd llama_sft

ls -l
Download the model
Download the model to the persistent directory to avoid needing to download it later. In this tutorial, the model directory is "/workspace/Meta-Llama-3-8B-Instruct".
pip install modelscope
modelscope download --model LLM-Research/Meta-Llama-3-8B-Instruct --local_dir /workspace/Meta-Llama-3-8B-Instruct
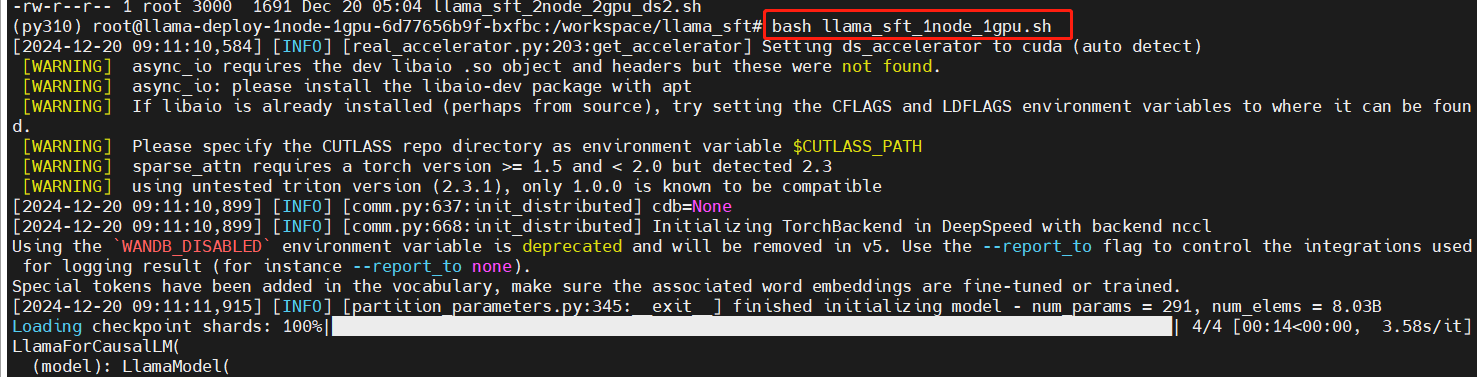
Run the single-node single-GPU fine-tuning script
bash llama_sft_1node_1gpu.sh
Training starts:
Training in progress:

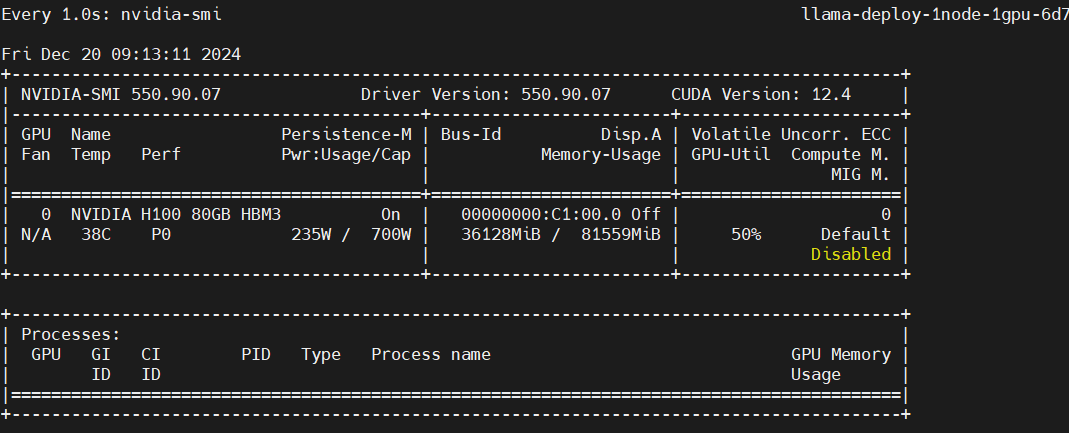
Monitor GPU utilization
In a separate terminal, enter the Pod and run the following command:
watch -n 1 nvidia-smi
Single-Node Multi-GPU Fine-Tuning
Create the Deployment
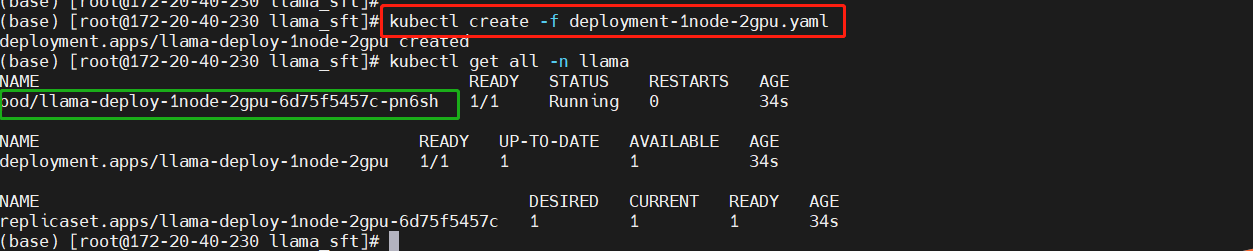
kubectl create -f deployment-1node-2gpu.yaml
kubectl get all -n llama
Enter the working directory in the Pod
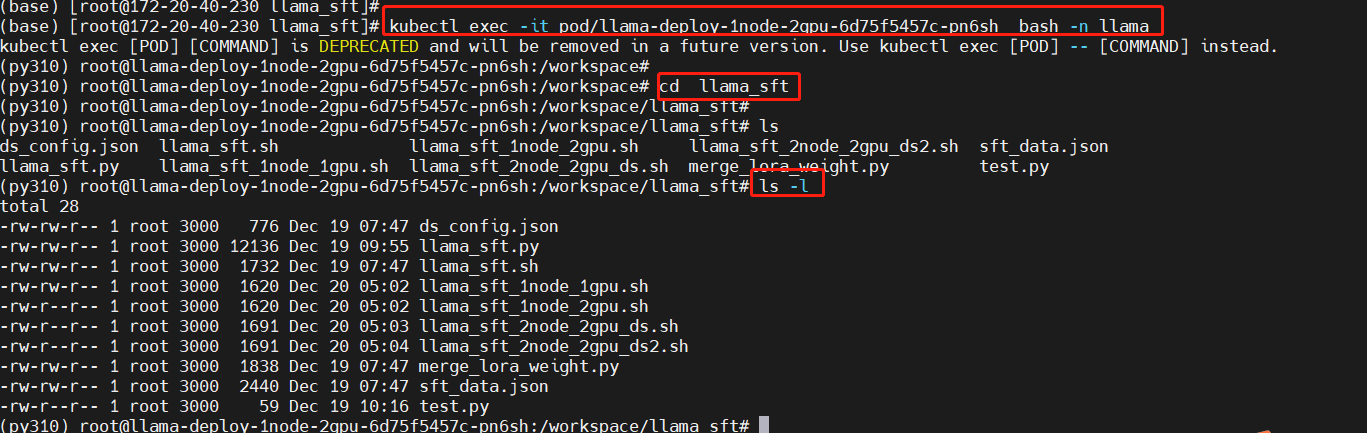
Replace the Pod name with the actual name of the Pod you created.
# Pod-1
kubectl exec -it pod/llama-deploy-1node-2gpu-6d75f5457c-pn6sh  bash -n llama

cd llama_sft

ls -l
Run the single-node multi-GPU fine-tuning script
bash llama_sft_1node_2gpu.sh
Training starts:
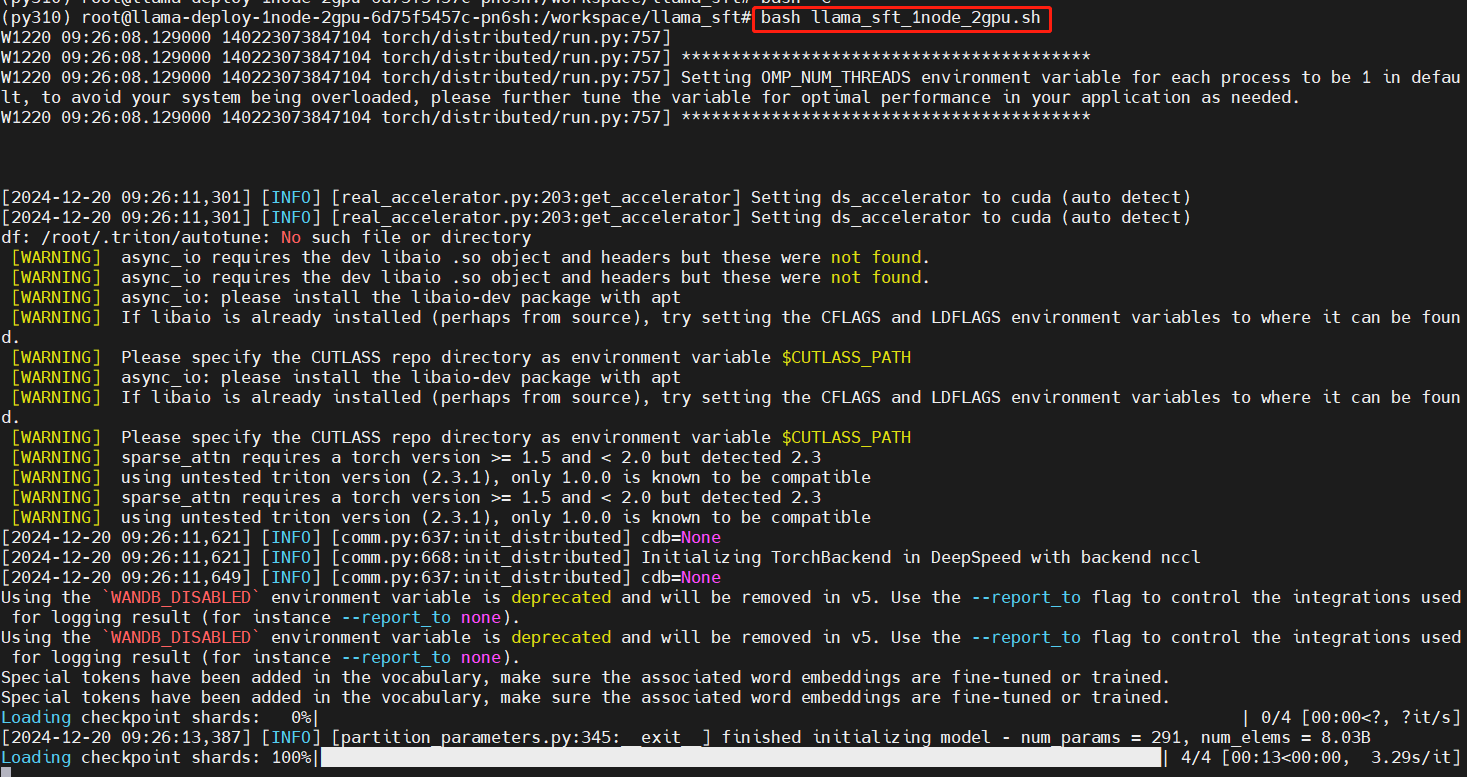
Training in progress:

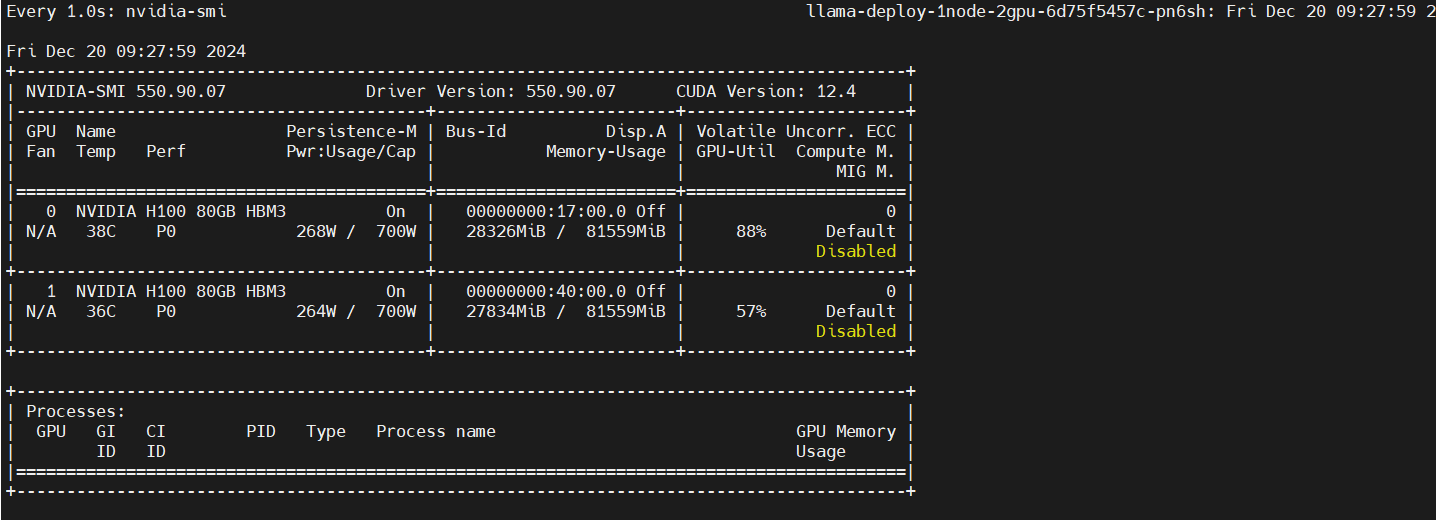
Monitor GPU utilization
In another terminal, enter the Pod and run the following commands:
kubectl exec -it pod/llama-deploy-1node-2gpu-6d75f5457c-pn6sh  bash -n llama
watch -n 1 nvidia-smi
Multi-node, multi-GPU fine-tuning
Create the Deployment
kubectl create -f deployment-2node-2gpu.yaml
kubectl get all -n llama -o wide

On the primary node, enter the working directory
Select one Pod as your primary node and enter the working directory to perform the configuration. In this example, the Pod with IP "172.29.203.147" is used as the primary node.
Replace the Pod name with the actual name of the Pod you started.
# Pod-1
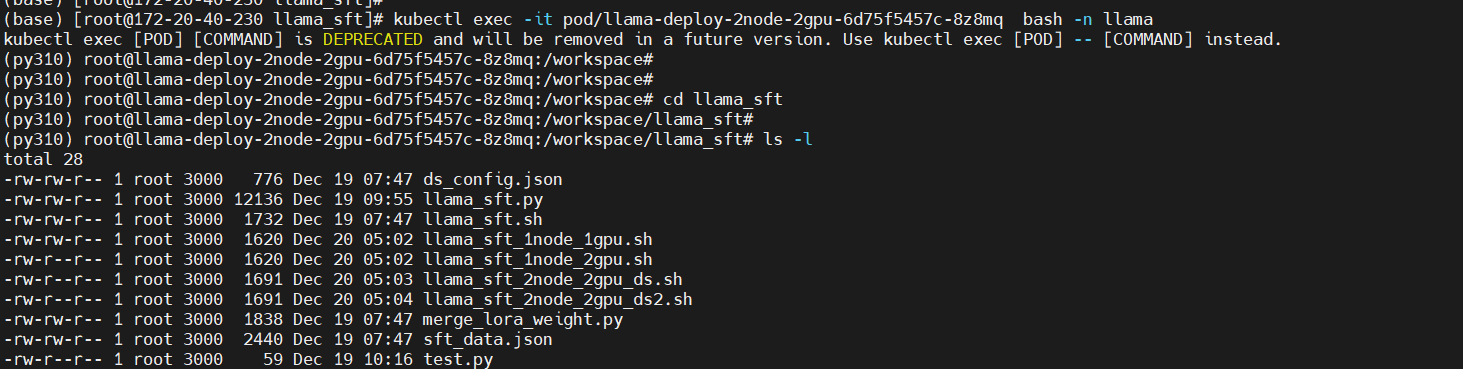
kubectl exec -it pod/llama-deploy-2node-2gpu-6d75f5457c-8z8mq bash -n llama
cd llama_sft
ls -l
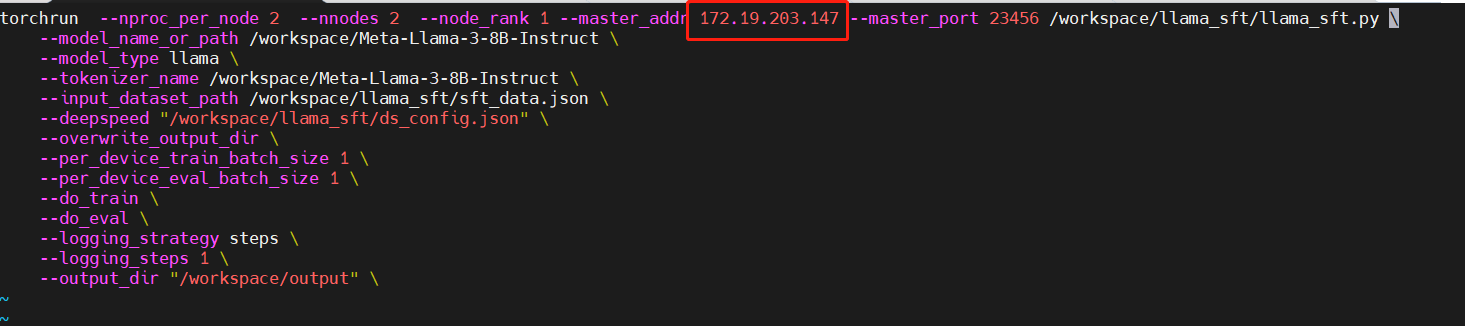
Modify the multi-node multi-GPU fine-tuning scripts
Modify the "master_addr" parameter in the "llama_sft_2node_2gpu_ds.sh" and "llama_sft_2node_2gpu_ds2.sh" scripts as shown below:
File "llama_sft_2node_2gpu_ds.sh"

File "llama_sft_2node_2gpu_ds2.sh"
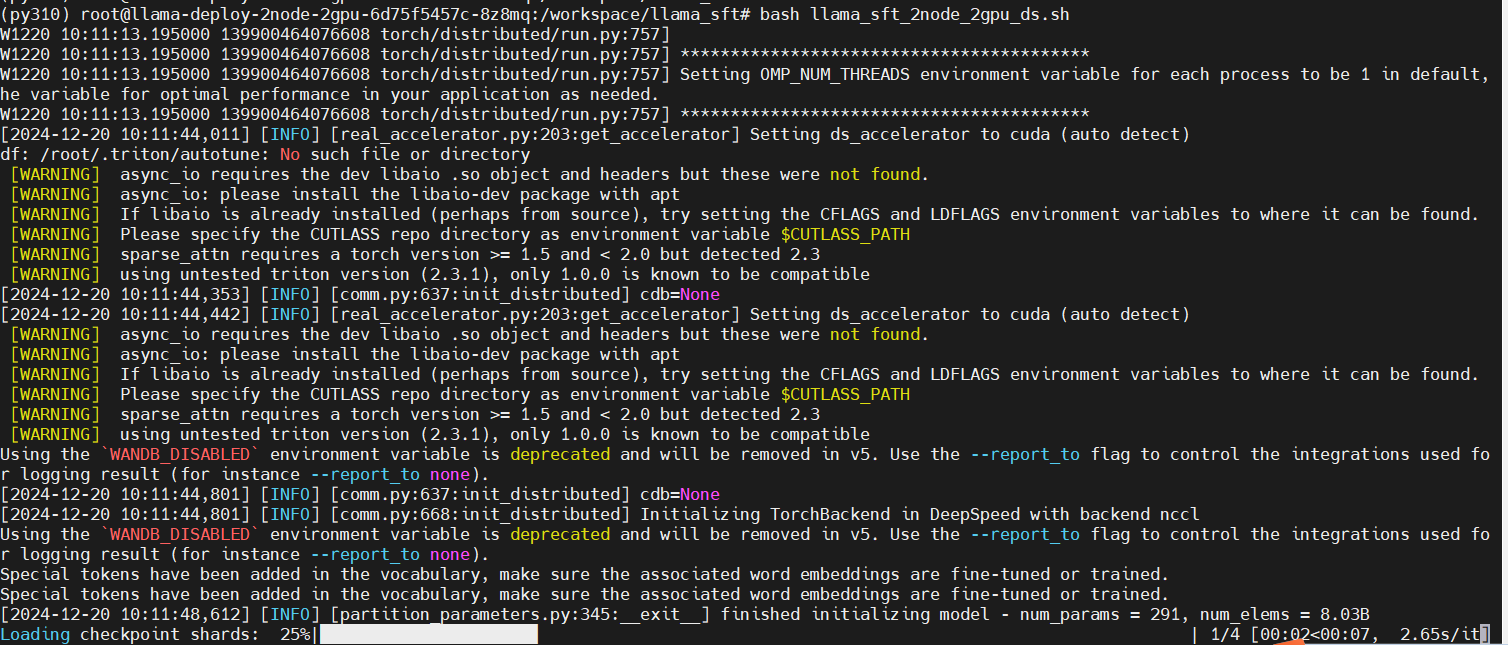
Run the multi-node multi-GPU fine-tuning script in the primary node
bash llama_sft_2node_2gpu_ds.sh
Run the multi-node multi-GPU fine-tuning script in the secondary node
# Open a new terminal
kubectl exec -it pod/llama-deploy-85678bfb74-sbdxc  bash -n llam
cd llama_sft
bash llama_sft_2node_2gpu_ds2.sh
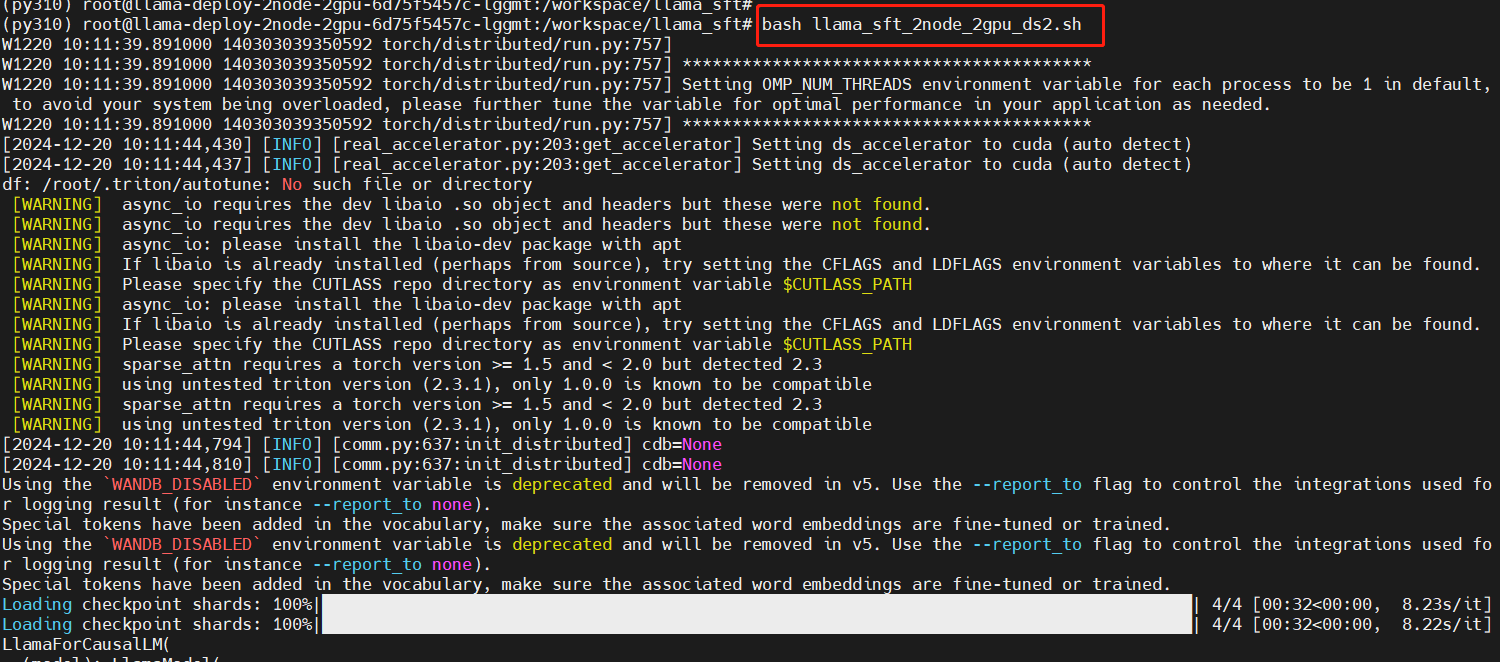
Training in progress:

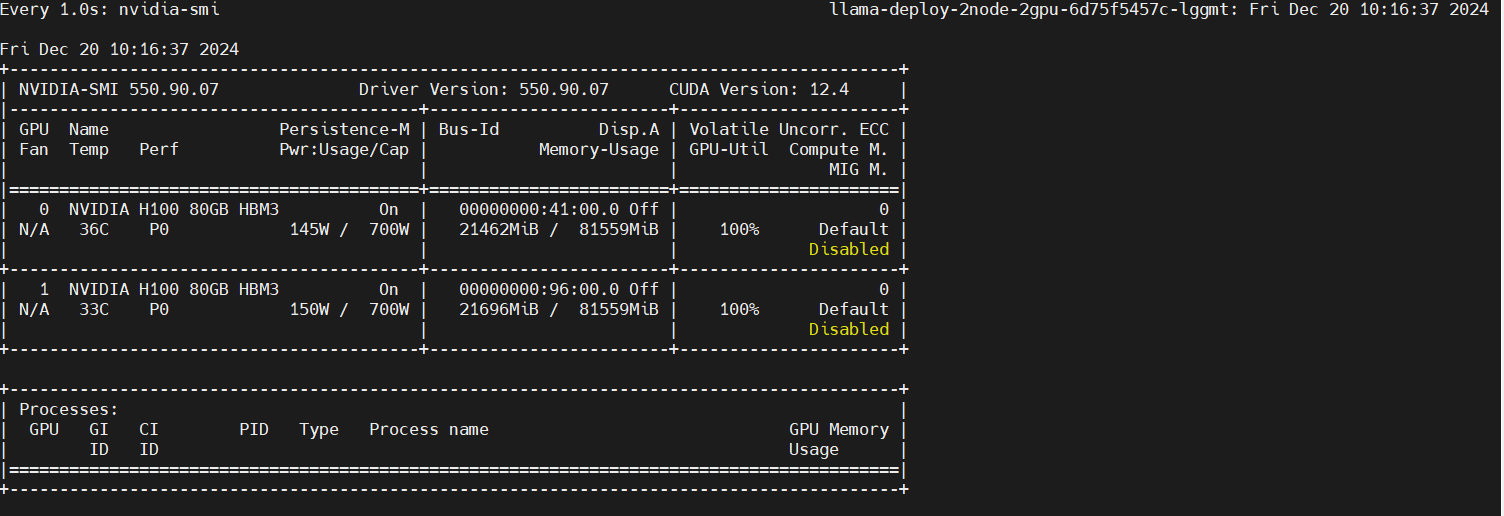
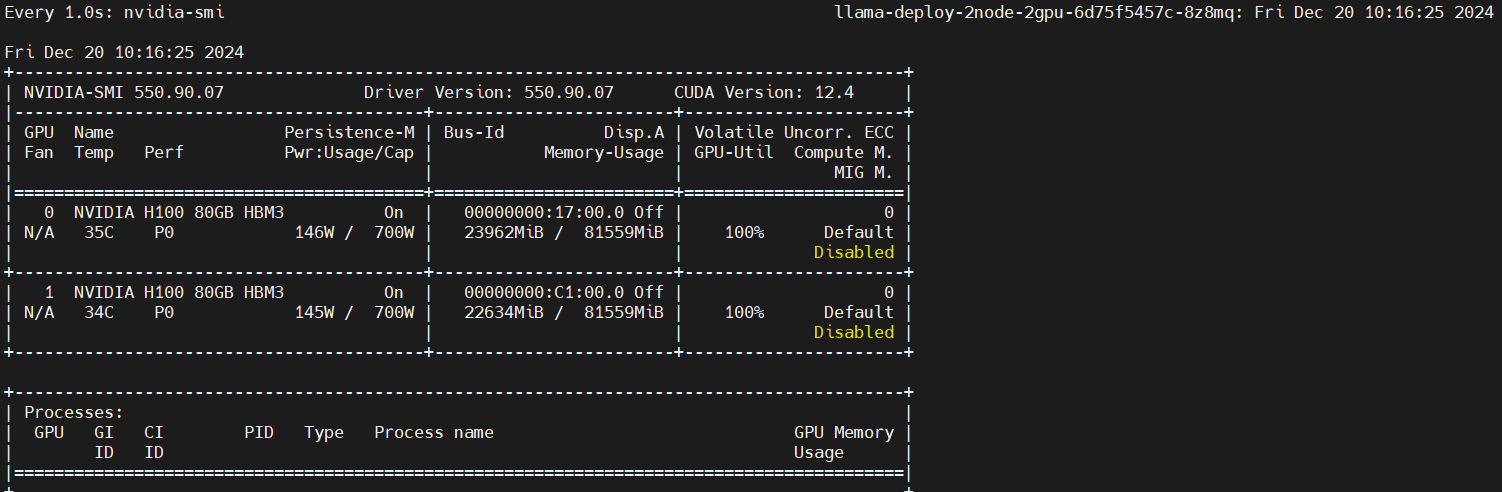
Monitor GPU utilization
In two additional terminals, enter the primary and secondary nodes respectively and run the following commands to monitor GPU utilization.
Primary node:
kubectl exec -it pod/llama-deploy-2node-2gpu-6d75f5457c-8z8mq  bash -n llama
watch -n 1 nvidia-smi
Secondary node:
kubectl exec -it pod/llama-deploy-1node-2gpu-6d75f5457c-pn6sh  bash -n llama
watch -n 1 nvidia-smi