File Storage Provisioning and Management
Mass storage, high-performance storage, and AI-accelerated storage services all provide file storage capabilities. The File Storage service on the Alaya NeW platform is designed for storing and managing application/Virtual Kubernetes Services (VKS) data as well as user-defined uploaded data, and allows users to access these files within their applications or VKS. For more detailed information, see below.
Prerequisites
-
You have obtained your Alaya NeW company account credentials. If you need assistance or have not yet registered, please refer to User Registration.
-
Your current company account has sufficient balance to cover the storage service. or Contact US for further assistance.
Procedure
With the following steps, you can easily provision file storage services, create storage spaces, manage your storage, and handle your files efficiently and securely.
Create File Storage
- Sign in to the Alaya NeW Cloud console using your company account. Multiple entry points are available for file storage provisioning, allowing you to choose your preferred method based on product requirements and personal usage habits. For details, refer to the sections below.
-
After signing in, select the [Products/Storage] menu, click on the storage product to enter the overview page, and then click the "Create Now" button to access the storage configuration page, as shown below.
-
Alternatively, go to the [Product Center/Storage Management] menu item and click the "Create New Storage" button to enter the storage configuration page, as illustrated below.
-
Configure storage parameters as required on the configuration page. Parameter descriptions are as follows:

Configuration Description Requirements Required AI Data Center The data center that hosts the File Storage service. Select an available data center (e.g., Beijing-Region-1, Beijing-Region-2, Beijing-Region-3, Beijing-Region-4, Beijing-Region-5, etc.) Yes Pricing Option How resources in the selected data center are charged. Select currently supported billing methods, such as Pay-as-you-go. Yes Storage Configuration Select File Storage in the corresponding data center and set the total storage capacity. Storage range: 200 GB–20,000 GB Yes
- Once configuration is complete, click "Create Now" to activate your file storage service.
File Storage Management
- Sign in to the Alaya NeW platform using your company account. Click the [Product Center] menu, switch to the "Storage Management" tab to access the storage management overview, as shown below.
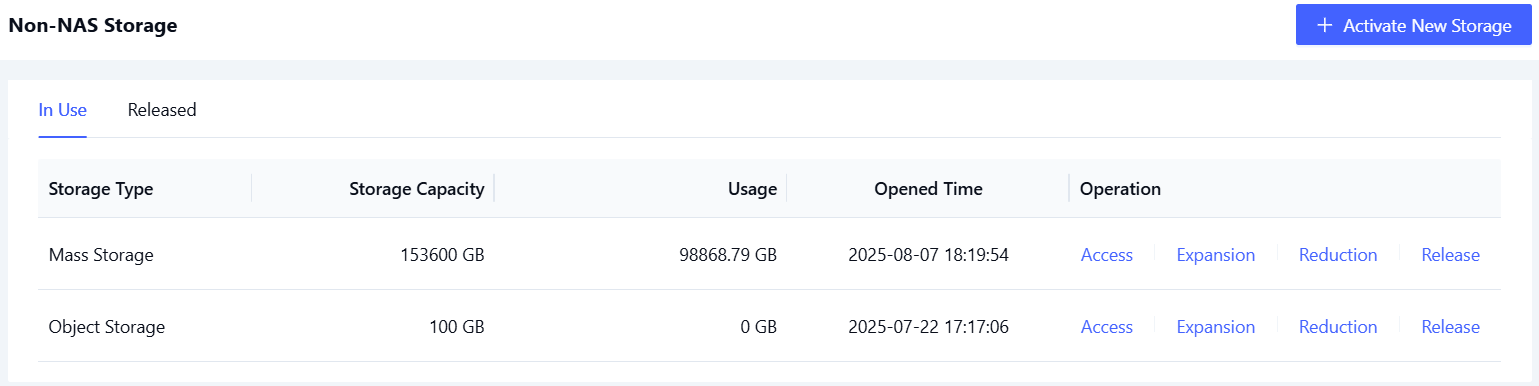
Currently, only "High-Capacity Storage" supports the storage management system.
- Access Storage
- Scaling Up
- Scaling Down
- Releasing Storage
-
Locate your mass storage and click the "Access" link in the operations column to view its configuration details. Within the file management system, you can browse directories and manage files.
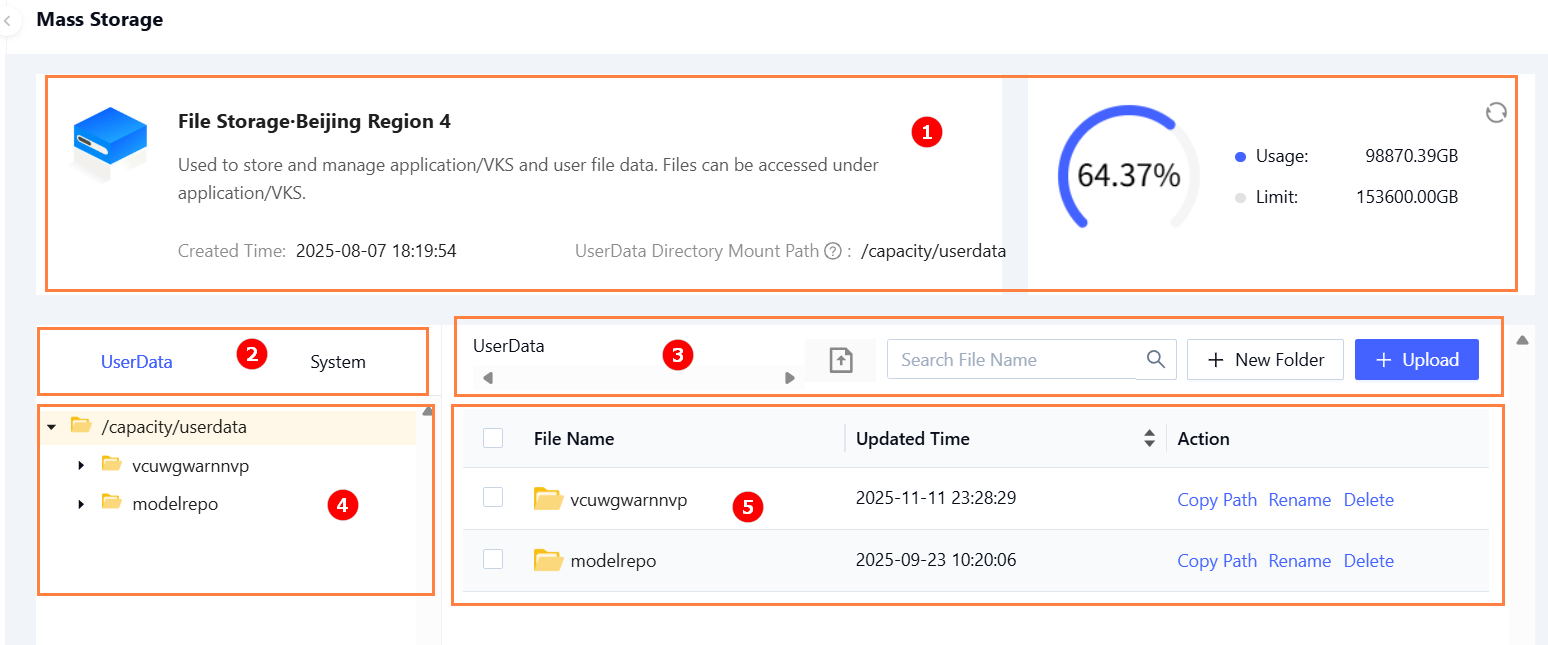 The file management page provides the following functions:
No. Section Description ① Overview View storage usage, quota limits, UserData mount paths, and storage provisioning date. ② Directory Structure File directories are classified into SystemandUserdata(1).③ Directory Management In any given directory, you can create folders, upload files/folders, and monitor upload tasks and file transfers. (2). ④ Directory Contents Select a specific directory to view its list of files. ⑤ File Operations Copy file/folder paths, rename, download, or delete files/folders in the selected directory.
(1)There are two top-level directories under file storage: System and UserData:
- System: Stores application data. Application data is automatically stored in this directory and cannot be managed directly.
- Userdata: Stores user data. Users can create custom directories and manage their data.
(2)Click the icon to view the transfer task list and manage file transfers.
-
Click the pause icon for a transfer task to pause the transfer (as shown below).
-
Click the delete icon for a transfer task to remove it from the list (as shown below).
-
Locate your mass storage resource and click the “Expansion” link in the Actions column to access the scaling configuration details page, as shown below.
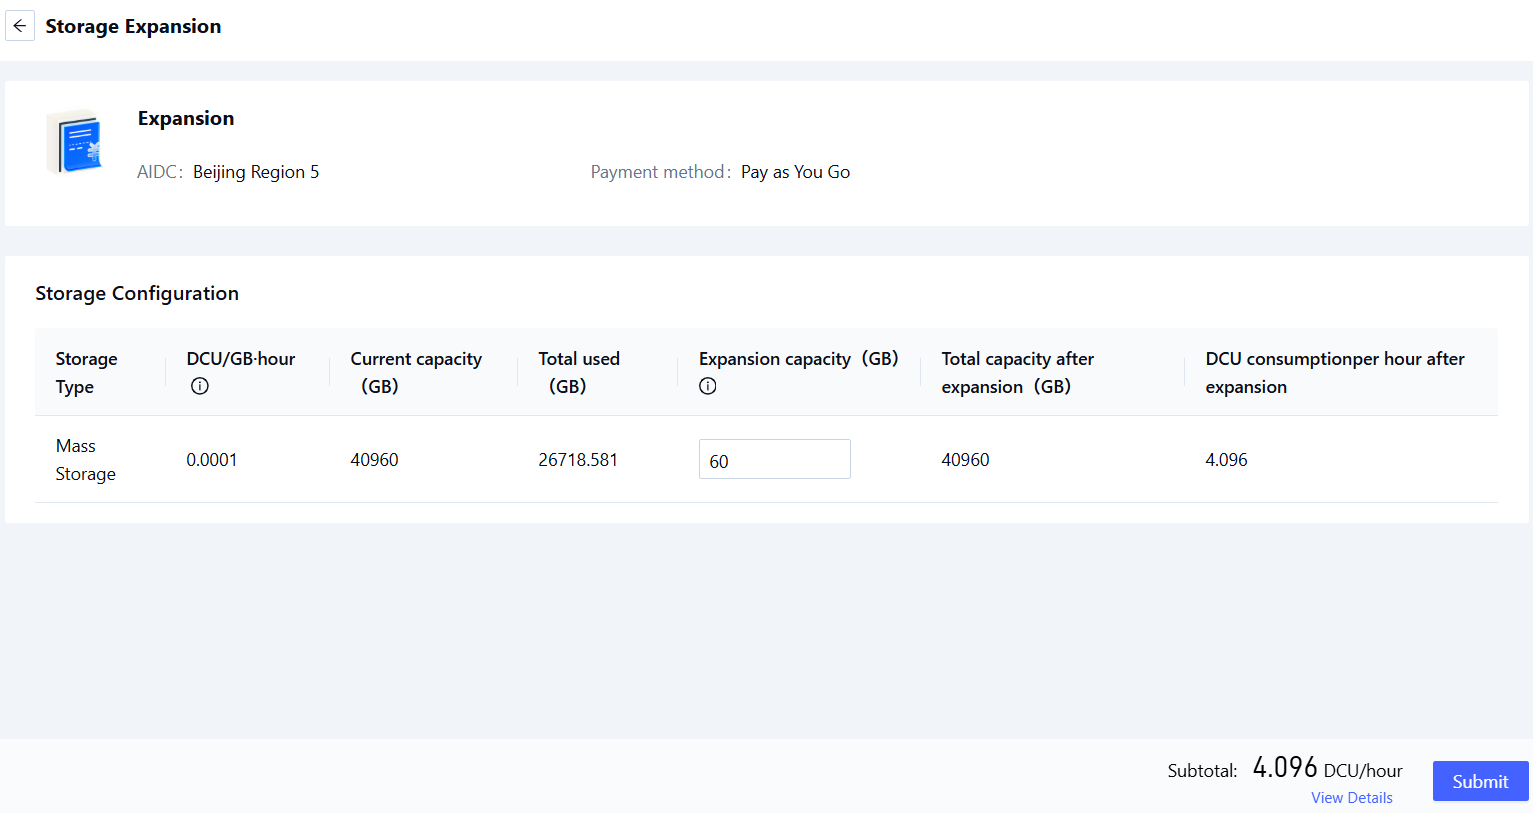
-
Specify value of parameter “Expansion Capacity to”. Once you have completed your configuration, click the “Submit” button to finish the storage scaling operation.
After expansion, the total capacity range will be from the current storage total up to 20,000GB.
-
Locate your mass storage resource and click the “Reduction” link in the Actions column to access the reduction configuration details page, as illustrated below.

-
Specify parameters such as “Reduction Capacity”. After configuration is complete, click the “Submit” button to finalize the operation.
- Locate your mass storage resource and click the “Release” link in the Actions column. The system will prompt a storage release confirmation dialog, as shown below.
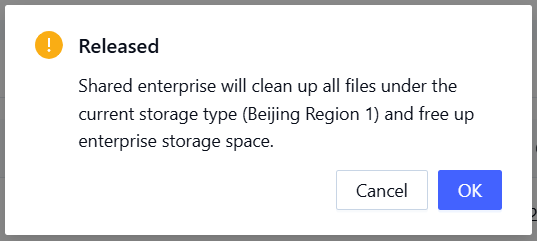
- After confirming the release, click the “Confirm” button to complete the storage release process.