Container Image Registry Creation and Management
The Container Image Registry provides a service for storing and distributing Docker images. This service allows users to upload, store, and download Docker images, creating rapid deployment of applications across different environments. Through the container image registry, you can manage image versioning, sharing, and collaboration.
Prerequisites
- You have obtained your Alaya NeW Cloud company account credentials. If you need assistance or have not yet registered, refer to the User Registration.
- Your enterprise account has sufficient balance to use the container image registry service. For additional questions, please Contact US.
Procedure
The following section describes how to enable the Container Image Registry, configure storage capacity, manage repositories, and access image resources efficiently and securely.
Create Container Image Registry
- Sign in to the Alaya NeW Cloud with your company account. The console provides multiple options for creating an container image registry, select the path that best fits your needs.
-
After logging in, navigate to [Products/Storage], select the “Container Image Registry” product, open the product overview page, and click “Activate Now” to access the configuration options.
-
Alternatively, go to [Product Center/Storage Management] and click “Activate New Storage” to open the configuration page.
-
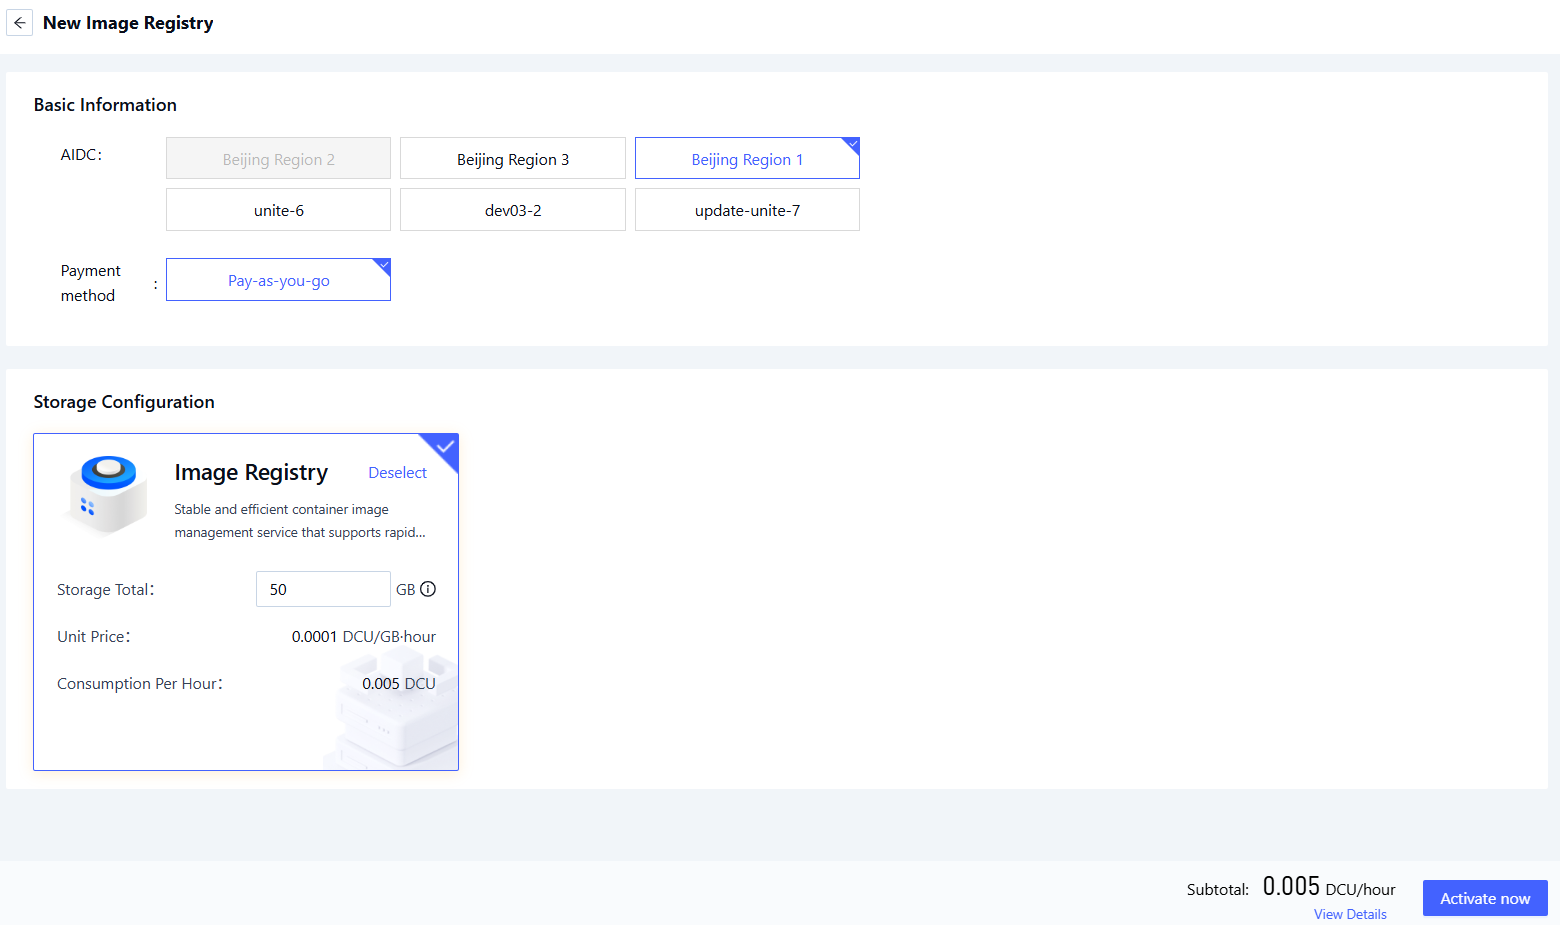
Configure the required storage parameters:
Parameter Description Requirement Required AI Data Center The data center that hosts the Storage service. Select an available data center (e.g., Beijing-Region-1, Beijing-Region-2, Beijing-Region-3) Yes Pricing Option How resources in the selected data center are charged. Select a supported pricing option (e.g., Pay-as-you-go). Yes Storage Configuration Configure image storage capacity. Capacity range: 50 GB – 4096 GB. Yes -
After configuration, click “Create Now” to provision the image storage.
Provisioning Notification
Provisioning results will be sent to you via SMS. Please check your messages and securely retain your access keys.
Container Image Registry Management
-
Sign in with your company account, navigate to Product Center, and switch to the Container Image Registry tab to access the management dashboard.
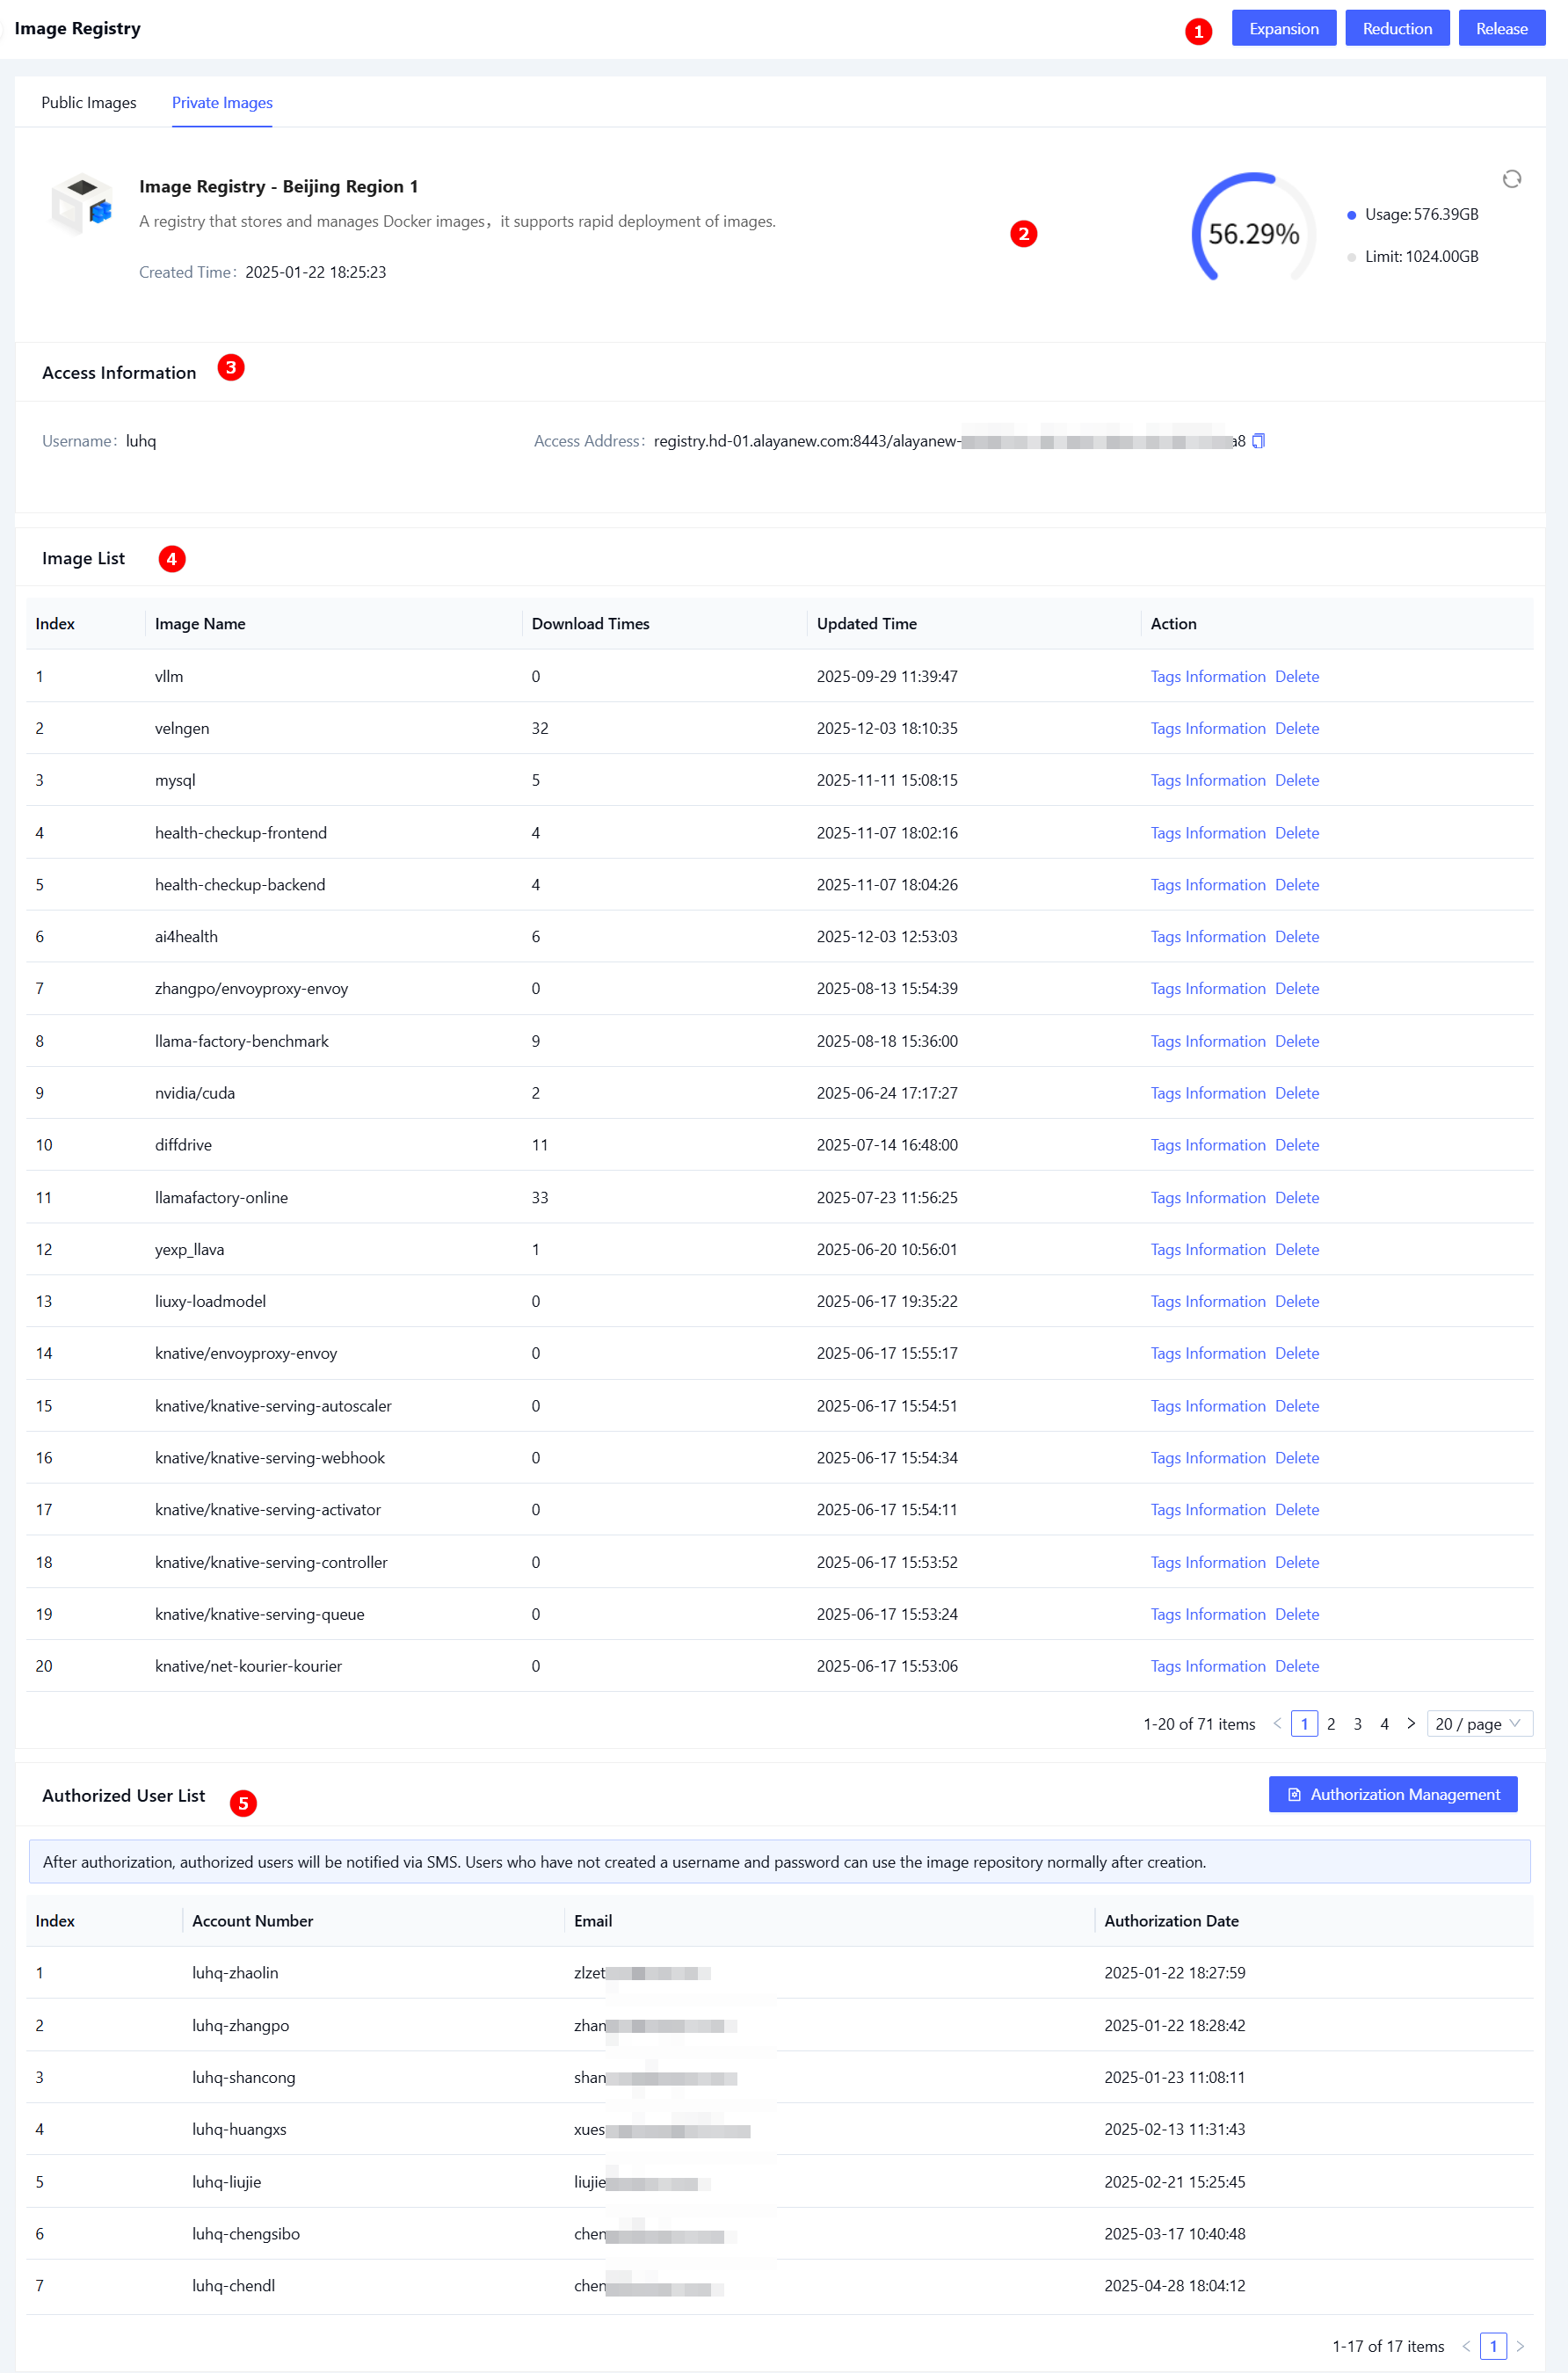
No. Section Description Actions ① Operations Provides actions such as expanding/reducing capacity, and releasing the registry Expansion, Reduction, Release ② Overview Display usage details, capacity limits, and creation date. View ③ Access Information Display connection and configuration parameters required for secure client access. View ④ Image List Lists all images in the repository, including name, download count, and last update time. Supports image deletion and tag management. View, Delete ⑤ Authorized User List Manage user accounts authorized to access and operate the container image registry. Authorization Management(1)
-
(1)Authorization management:
i. Click Authorization Management in the Authorized User List section to open the user authorization page.
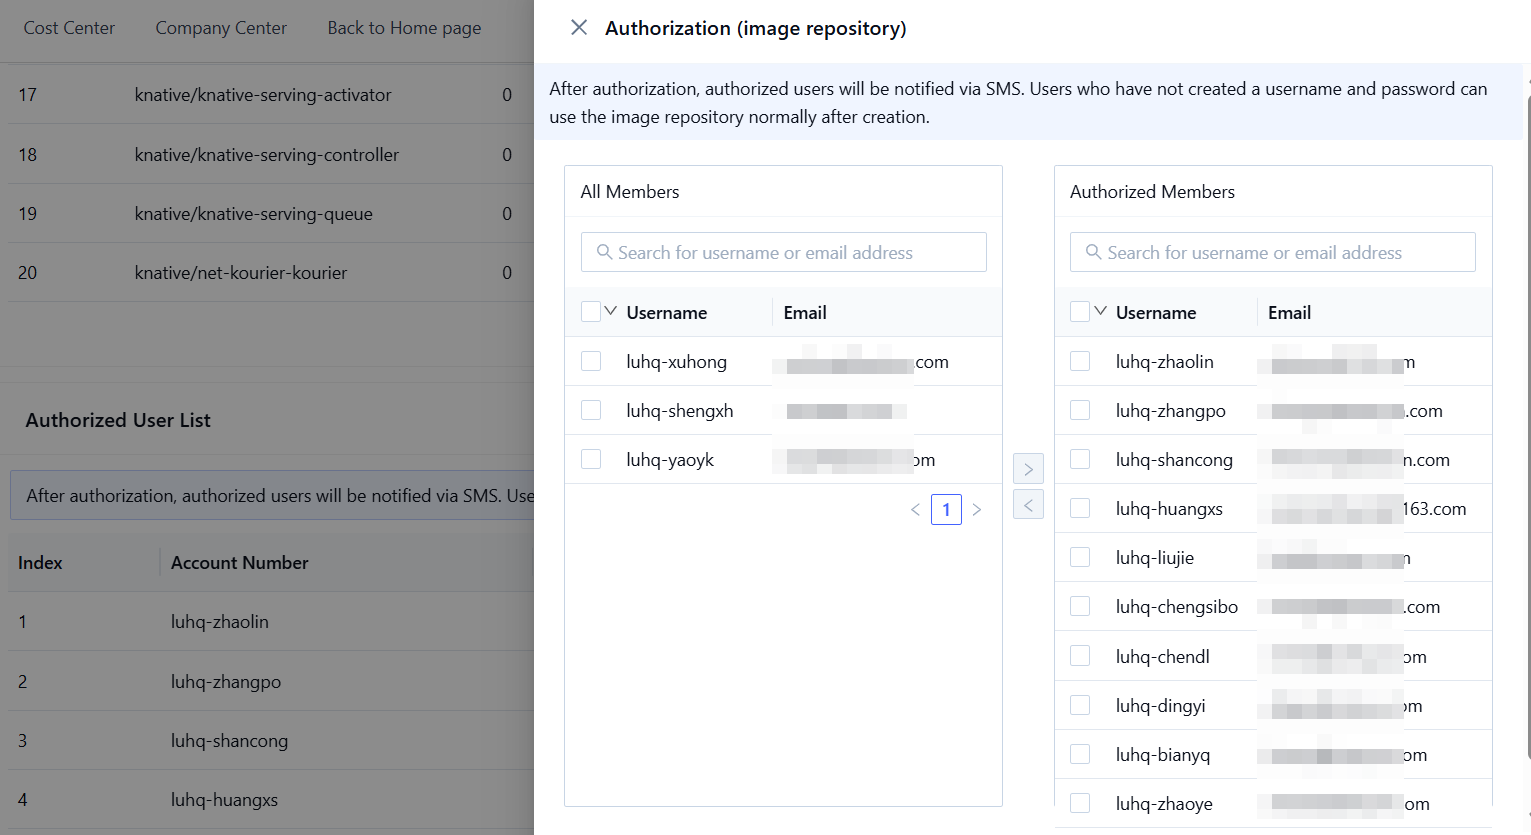
ii. Select users to authorize, then click the import icon. After adding all required users, click Confirm to complete authorization.
tipAuthorized users will receive an SMS notification. Users without Sign in credentials must create a username and password before accessing the Container Image Registry. :::
- Expand Capacity
- Reduction Capacity
- Release Storage
-
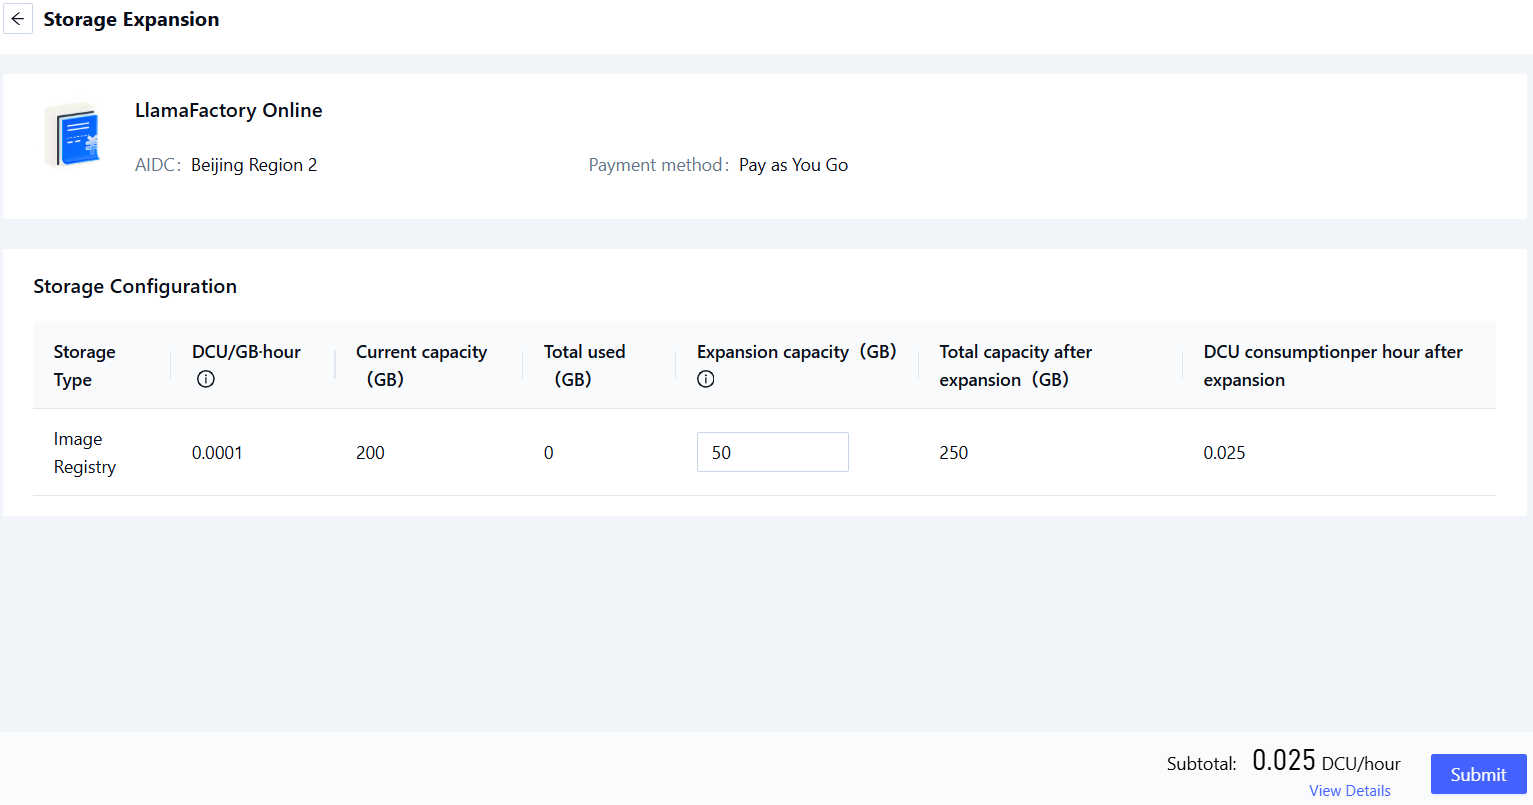
Click Expand in the operations area to open the expansion configuration page.
-
Configure the additional capacity, then click Submit to complete the expansion.
Capacity after expansion may not exceed 1024 GB.
-
Click the Reduction button in the operations area to open the Reduction configuration page.

-
Specify the desired Reduction amount and complete the required parameters. Once configuration is complete, click Submit to complete the reduction operation.
After Reduction, the total capacity must remain within the range of current used capacity up to 1,024 GB.
-
In the operations area, click the Release button. A confirmation dialog will appear, as shown below.
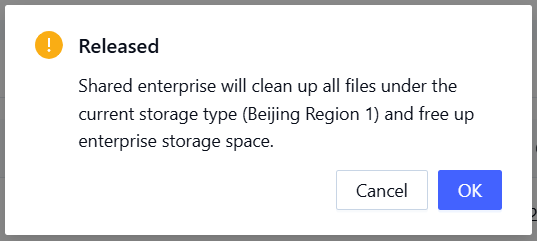
-
After reviewing the prompt, click Confirm to complete the storage release operation.
Authorization Management
Using the Container Image Registry
- For detailed instructions on managing images, see the Container Image Registry Usage.
- You can also manage container images with Harbor. For integration and operational guidance, refer to the Using Harbor for Image Management.