Object Storage Provisioning and Management
Object Storage Service (OSS) is Alaya NeW Cloud’s object-based, large-capacity storage offering for storing massive amounts of unstructured data. Depending on your organization’s current storage provisioning, you can provision Object Storage using one of the two methods described below.
Prerequisites
-
You have an Alaya NeW company account and password. If you need assistance or have not yet registered, see User Registration.
-
Your company account has sufficient balance to cover storage usage. or Contact US for further assistance.
Procedure
Follow the steps below to provision Object Storage, provision storage capacity, manage storage, and manage objects—so you can store data efficiently and securely.
Provision Object Storage
- Sign in to the Alaya NeW plaform console with your company account. The platform provides multiple entry points for creating Object Storage; choose the path that best fits your workflow and requirements.
-
After signing in, select the [Products / Storage] menu, click the "Object Storage" product to open the product overview, then click “Enter Immediately” button to proceed to the configuration page.
-
Alternatively, go to [Product Center / Storage Management / Non-NAS Storage] and click the “Activate New Storage” button to open the storage configuration page.
-
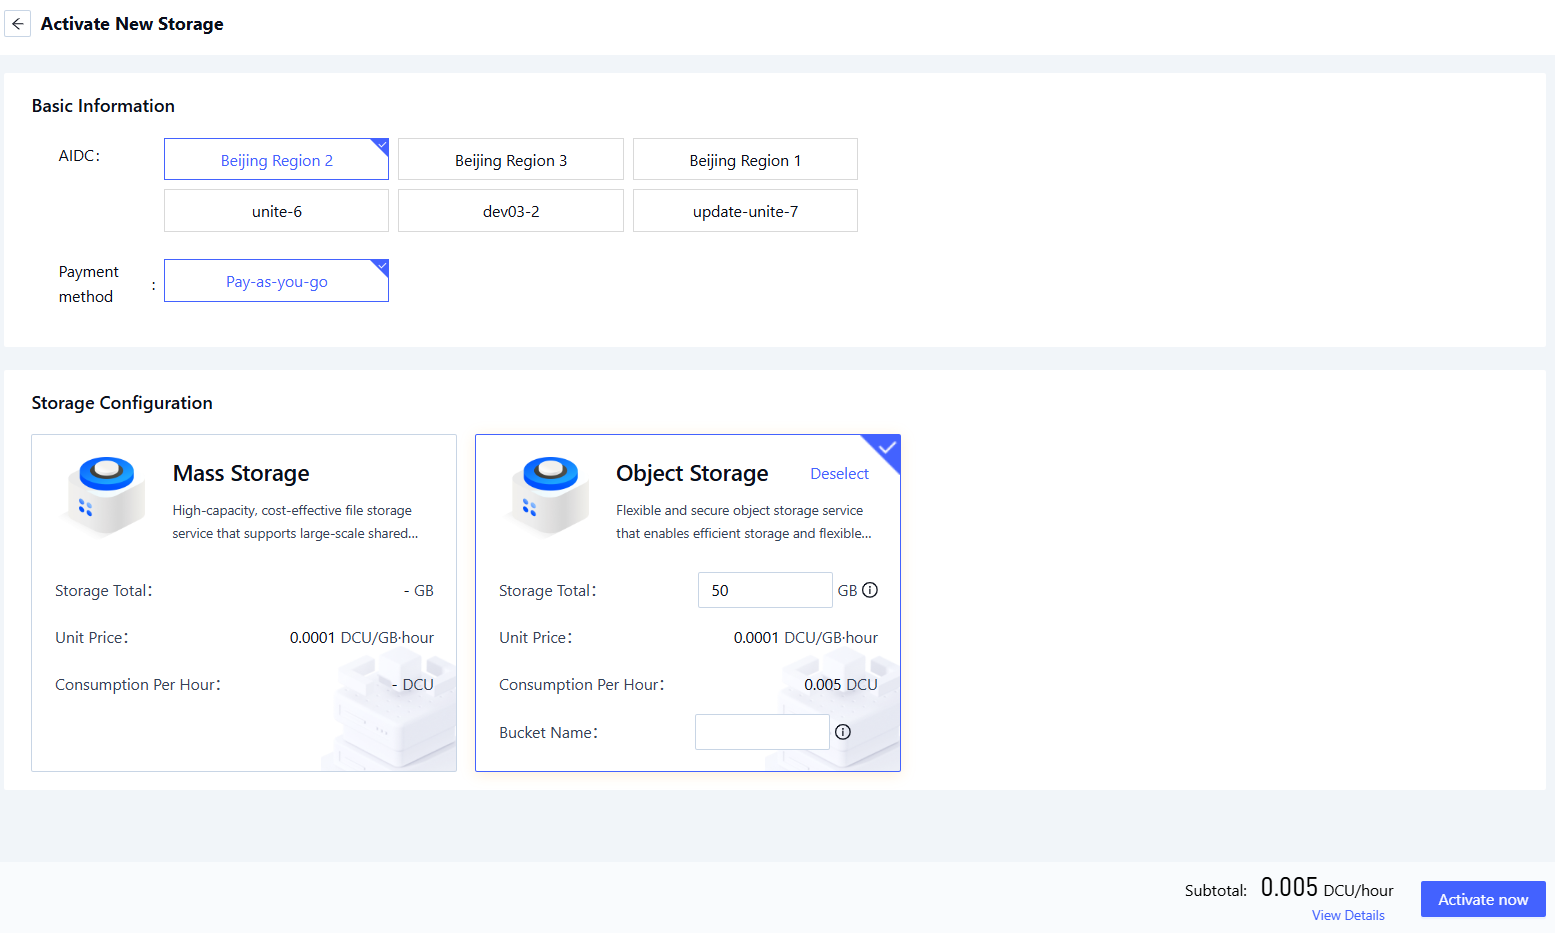
Set the necessary parameters on the configuration page as follows:
Parameter Description Requirements Required AI Data Center Data center that hosts the object storage. Select an available data center (e.g., Beijing-Region-1 to 5). Yes Payment Method Payment Method for using data center resources. Select a supported option (e.g., Pay-as-you-go). Yes Storage Configuration Object storage instance and total capacity. Select the desired capacity (range: 50 GB – 4096 GB). Yes
- Review your settings and click "Activate Now" to provision your Object Storage.
Provisioning Notification
Provisioning results will be sent via SMS (see example below). Please check your messages and safeguard your access keys.
Object Storage management
-
Sign in with your company account, select [Product Center] and navigate to the Storage Management tab to view an overview of your storage resources.
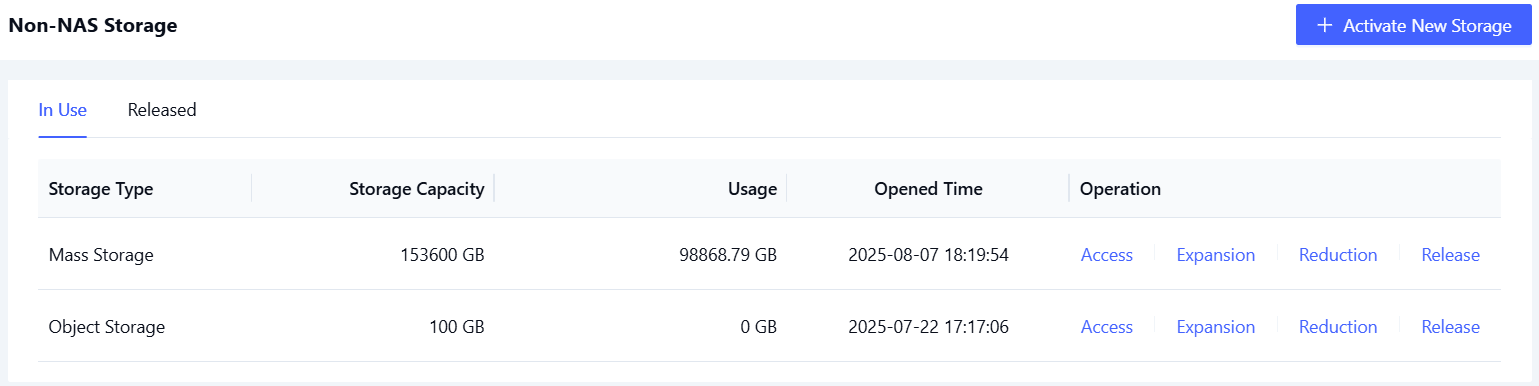
- Access storage
- Expand Capacity
- Shrink Capacity
- Release Storage
-
To manage Object Storage, locate your storage resource and click the “Access” link in the actions column.
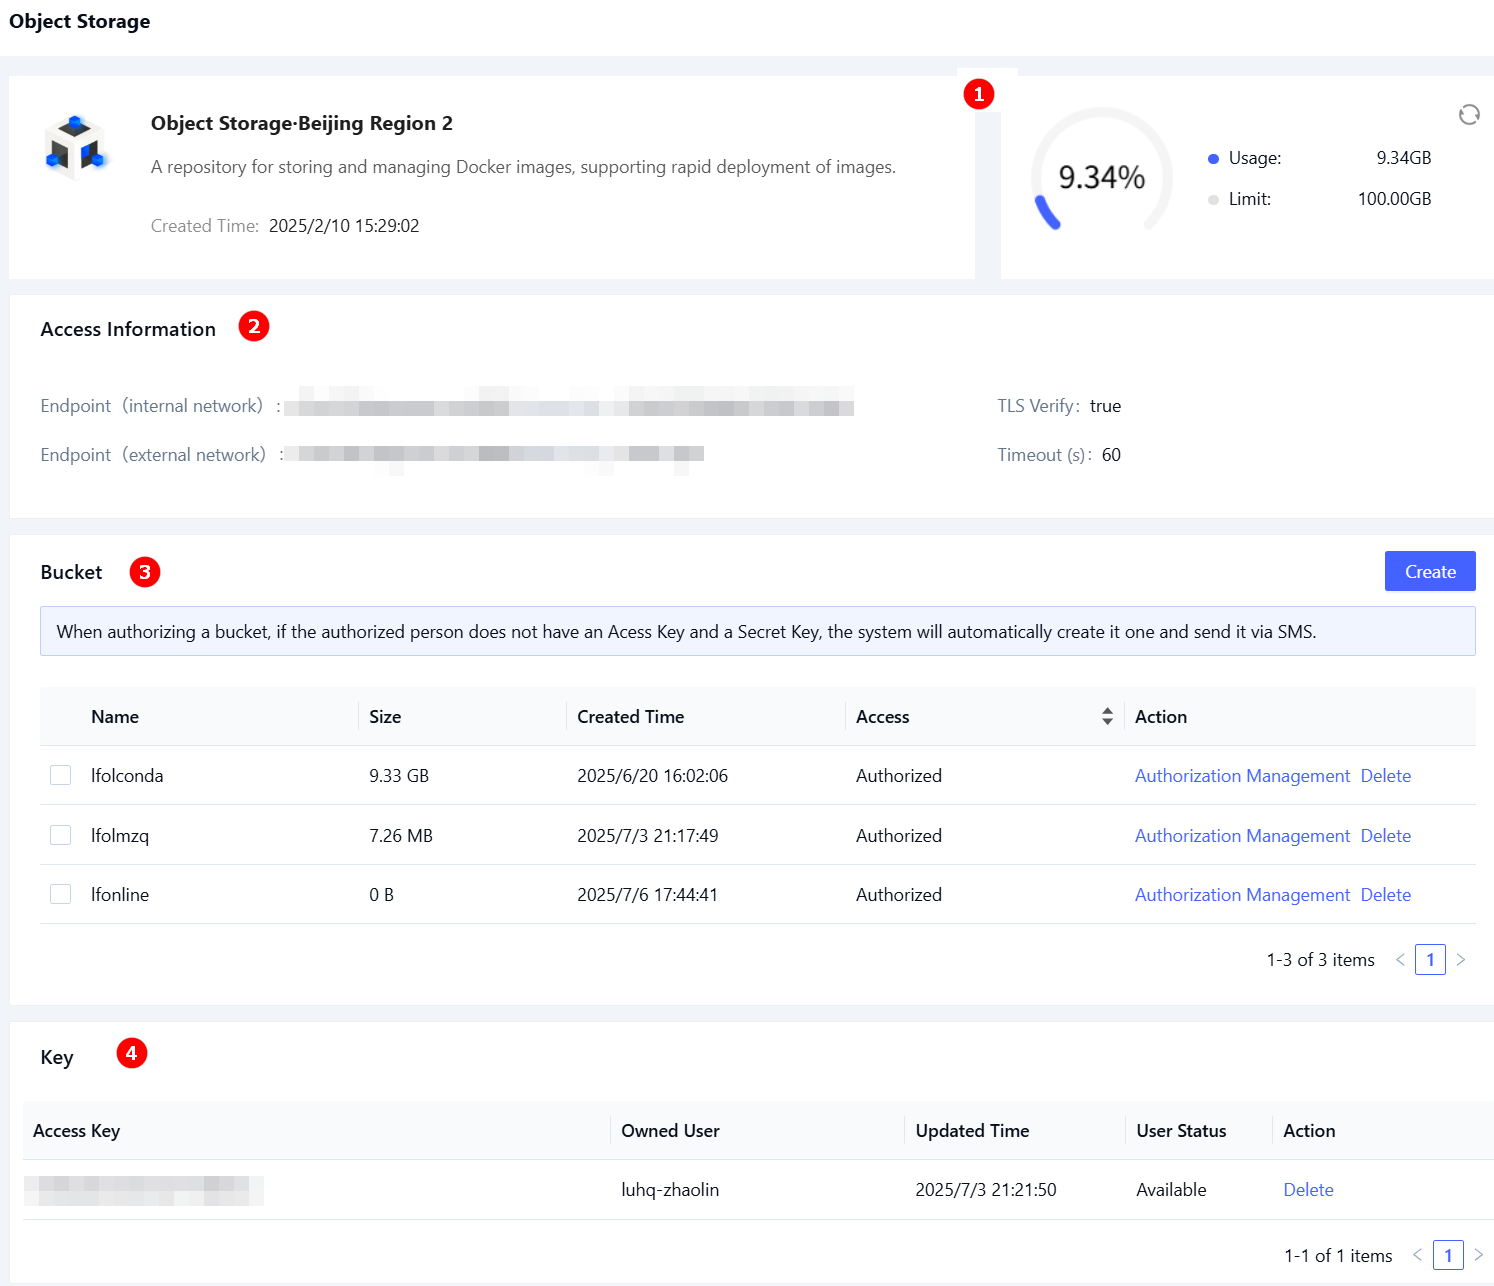
This opens the object storage management console, which provides the following capabilities:
| No. | Section | Description | Operations |
|---|---|---|---|
| ① | Overview | View storage usage, quota limits, and creation time. | View |
| ② | Access Info | View endpoint details and parameters needed for secure client configuration. | View |
| ③ | Bucket List | Buckets are the primary containers for data. You can create, authorize (1), or delete buckets to isolate and manage different workloads. | Create. Authorize (1) . Delete |
| ④ | Key List | Manage the list of Access Keys used for authentication and permissions (2) . | Delete |
-
(1) After a bucket is created by an administrator, it can be authorized for subaccounts. Authorized users may further delegate bucket access if needed. To authorize:
i. Click the Authorization Management button in the bucket’s action column to open the authorization dialog window.
ii. After selecting the users to be authorized, click the arrow icon in the middle of the dialog window to add them. Once the users have been added, click “Confirm” to complete the authorization.
-
(2) Each Access Key is associated with a specific user and serves as a credential for accessing Object Storage (paired with a Secret Key). The Access Key functions like a password in a username and password combination.
-
Locate your existing storage instance and click the Expansion link in the actions column to open the expansion configuration page, as illustrated below.
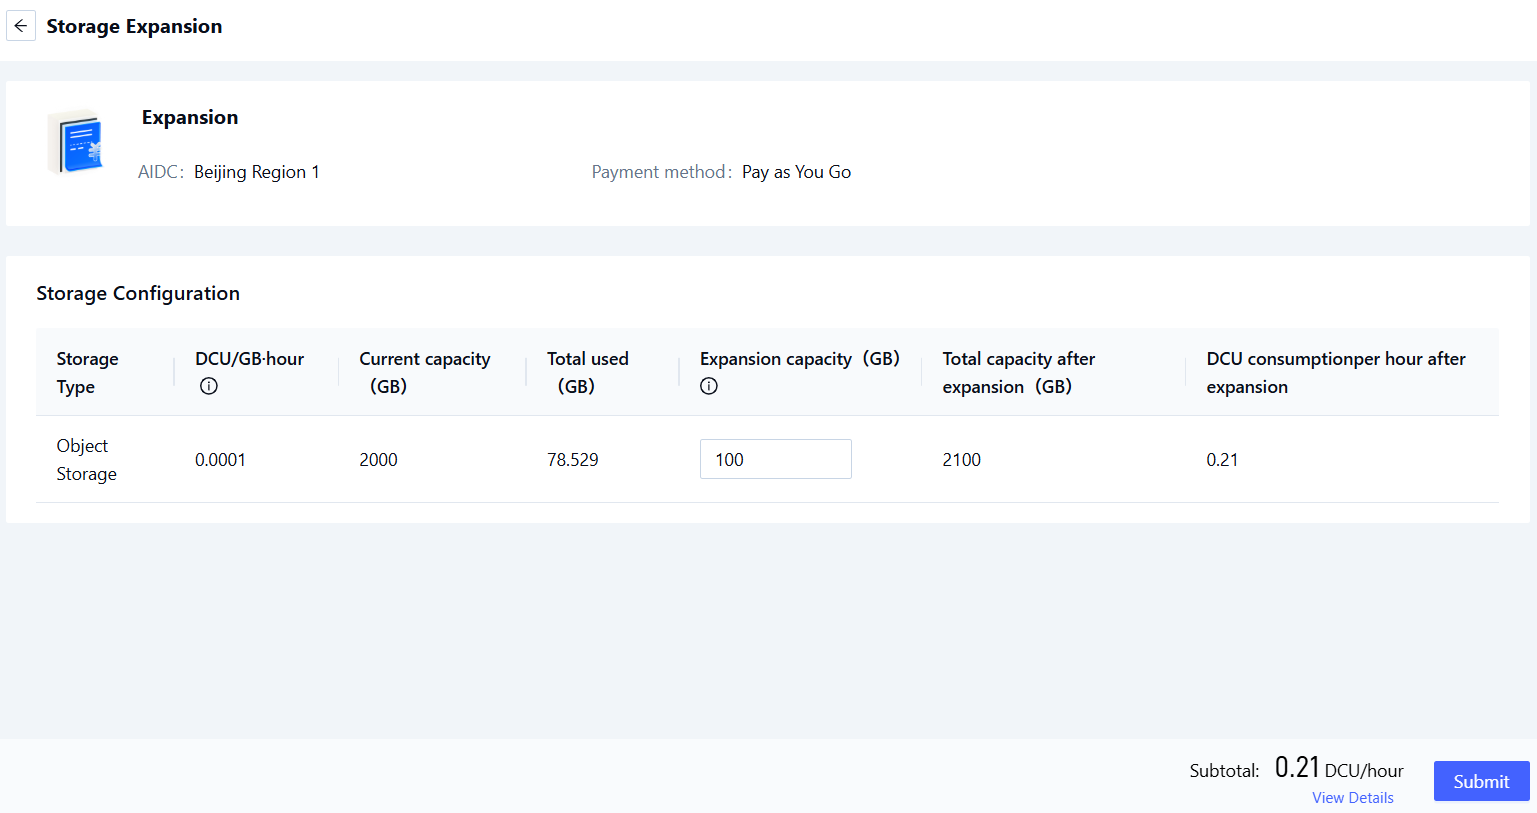
-
Specify the desired expansion capacity and complete the relevant parameters. Once configuration is complete, click Submit to finish the expansion process.
After expansion, the total available capacity can range from the current provisioned size up to 4,096 GB.
-
Locate your storage instance and click the Reduction link in the actions column to open the reduction configuration page, as shown below.
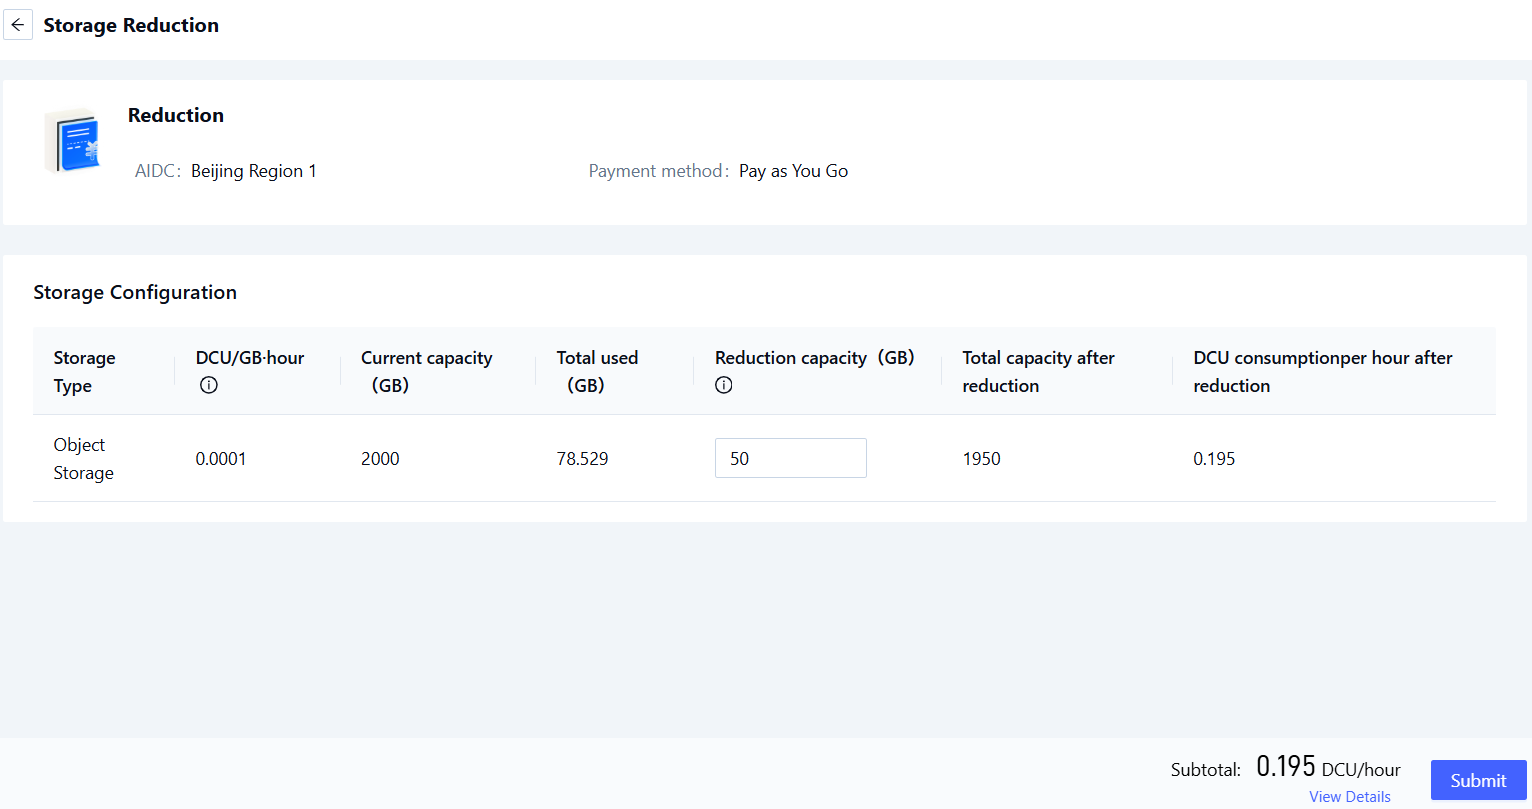
-
Specify the amount by which you want to reduce the capacity and complete the required parameters. Once the configuration is complete, click Submit to complete the shrink operation.
The reduction size must not exceed the currently available free capacity. To ensure proper functionality, at least 50 GB of available space must remain after reduction.
-
Locate your storage instance and click the “Release” link in the actions column. A confirmation dialog will appear, as illustrated below.
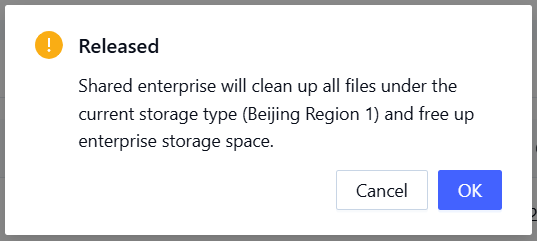
-
After reviewing the prompt, click Confirm to complete the storage release process.
Using Object Storage
For data upload and download, we recommend using rclone. See Using Object Storage for details.