Access the Cloud Container Instance via SSH
The platform supports remote access to cloud container instances via SSH and also allows passwordless access by configuring an SSH public key. This section explains how to access cloud container instances using two methods.
Prerequisites
A cloud container instance has been created, and its status is “Running.” For detailed steps, please refer to Creating a Cloud Container Instance.
Notes
- The platform has pre-installed and started the “openssh-server” service when CCI is created, so you do not need to manually install or start it.
- You can use the “SSH Access” feature only when the instance is in the "Running" State.
- Once the public key is successfully created, the system will automatically inject all keys in the current list into any newly created instances, allowing password-less SSH access.
- Instances that were created before the SSH key is added will not receive it automatically. Restart those instances to allow password-less access.
Method 1: SSH Login with password
-
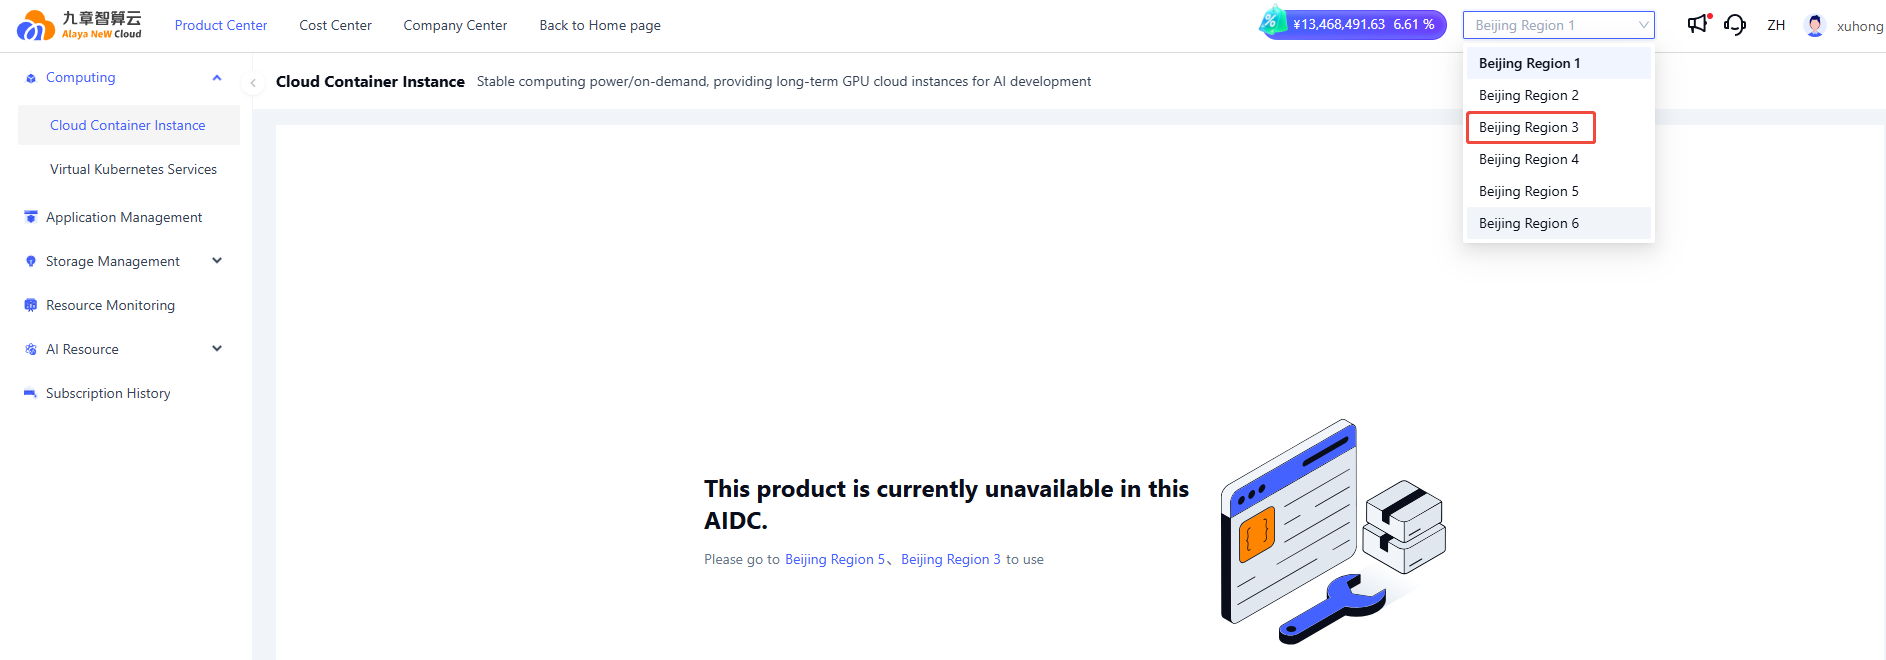
Sign in to the console, click "Product" > "Computing" > "Cloud Container Instance" to open the Cloud Container Instance page.
-
Click "Cloud Container Management" to open the CCI list page, then in the upper-right corner of the page, select the AIDC where the instance was created.
-
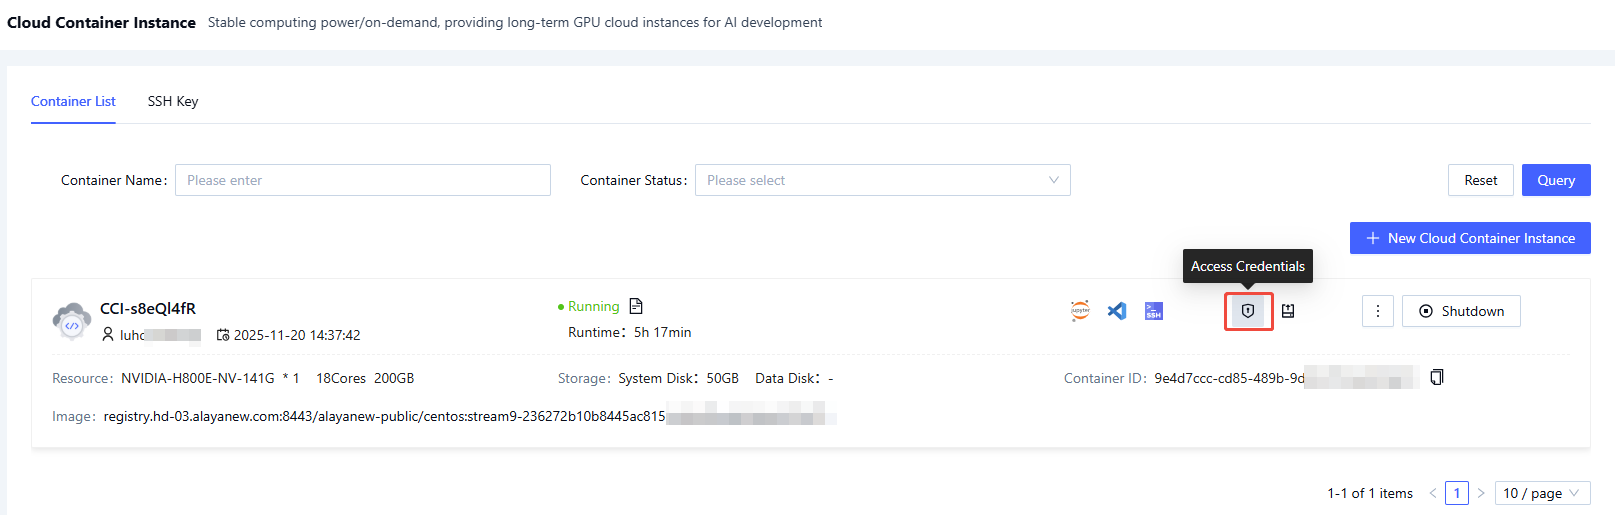
On the “Container List” tab, find the target instance and click the Access Credentials icon on the right.
-
In the pop-up dialog, copy the SSH connection command and password.

-
Open the terminal on your local machine, where:
- Windows users can Sign in using the built-in PowerShell or CMD.
- Mac users can use the built-in Terminal to complete the SSH login.
-
Paste the copied SSH connection command and password. If the following information is displayed, it indicates that you have successfully accessed the cloud container instance via SSH.

Method 2: Passwordless Login
1. Generate an SSH Key Pair
If a public key file already exists locally, skip this step.
a. Execute the following command in a terminal:
ssh-keygen
b. Navigate to the directory where the SSH public key is stored:
- Windows: The directory of the SSH public key file is
C:\user[user_name]\.ssh\id_rsa.pub - Linux: The directory of the SSH public key file is
~/.ssh/id_rsa.pub
c. Execute the following command to display the the public key for copying:
cat id_rsa.pub
2. Add the SSH Key
a. Sign in to the console, click "Product" > "Computing" > "Cloud Container Instance" to open the Cloud Container Instance page.
b. Click "Cloud Container Management" to open the CCI list page, then in the upper-right corner of the page, select the AIDC where the instance was created.
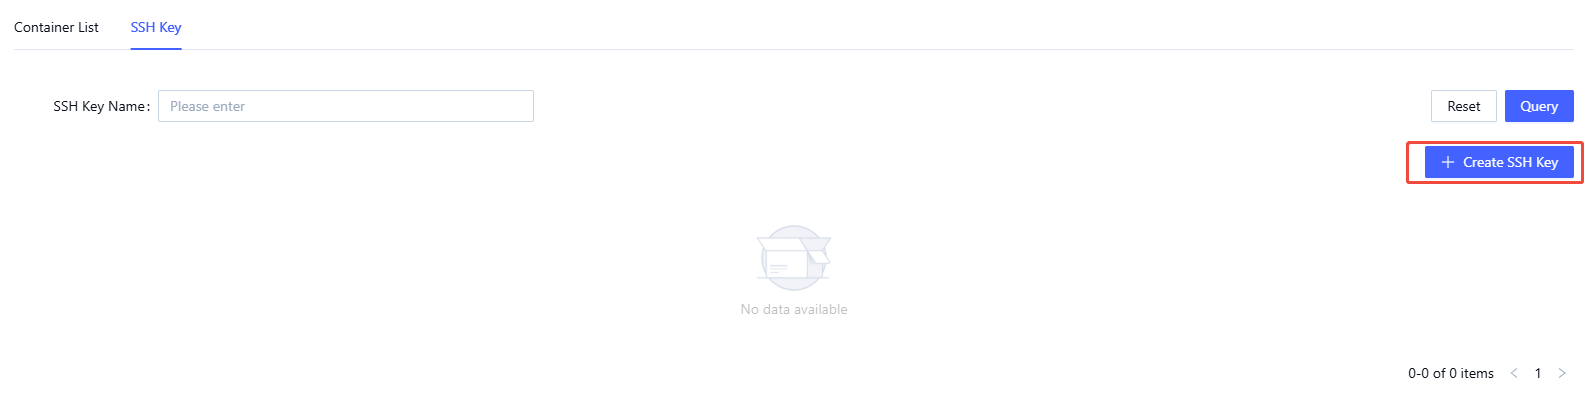
c. Click the "SSH Key" tab, and then click "Create SSH Key".
d. In the pop-up window opened, configure the SSH key name, description, and public key.
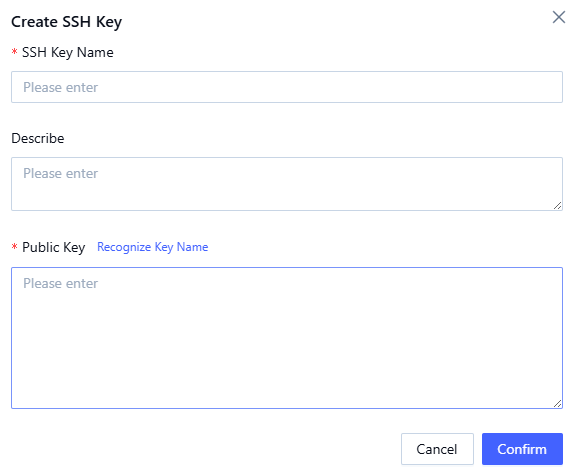
| Parameters | Description |
|---|---|
| SSH Key Name | Required. Name of this SSH key. |
| Description | Optional. Remarks for this SSH key. |
| Public Key | Required. The SSH public key copied from the local machine. |
e. After configuring the parameters, click “Confirm”. The newly created key appears on the SSH Key page, where you can also copy its content or delete it if needed.
After adding an SSH key, you must restart an existing instance or create a new instance before password-less login takes effect.
3. Access the Cloud Container Instance
On your local machine, open a terminal and connect via the specified port.
- If the configuration is correct, you can access the instance without needing a password.
- If the access fails, check the key configuration and instance status, then try again.