Deploying Models with vLLM on Cloud Container Instances
This section describes how to use the vLLM image on a Cloud Container Instance to deploy and invoke platform-provided large language models. This topic uses the deployment of the Baichuan2-7B-chat model as an example to illustrate the detailed procedure.
Prerequisites
- You have obtained your Alaya NeW company account and password. If you need assistance or have not registered yet, you can complete the registration by following the instructions in User Registration.
- Your company account has sufficient balance to use the Cloud Container Instance service. For the latest promotional details and pricing information, please Contact US.
Procedure
Step 1: Create a Cloud Container Instance
-
Sign in to the Alaya NeW platform using your company account. Choose "Product" > "Computing" > "Cloud Container Instance" to open the Cloud Container Instance page.
-
Choose [Create Cloud Container Instance] to open the instance creation page, and configure the instance name, description, AIDC name, and other parameters. In this example, configure the parameters as follows:
-
Resource Type:Select Cloud Container Instance – GPU H800A (1 GPU). -
For other parameters, refer to the table below.
Configuration Item Description Requirements Required Instance Name A unique identifier used to distinguish this Cloud Container Instance. Must start with a letter; supports letters, digits, hyphens (-), and underscores (_); length 4–20 characters. Yes Instance Description A brief text description of the container’s purpose or usage. None. No AIDC The data center used to support cloud container instance service. Select an available data center (for example, Beijing Region 3 or Beijing Region 5). Yes Payment Method The method for using data center resources. Select the supported payment method. Currently, Pay-As-You-Go is used. Yes Resource Configuration Detailed computing resource specifications, including resource type, GPU, compute resource, and disk configuration. Select resources that meet your requirements. Yes Storage Configuration Optional NAS storage that can be mounted to the Cloud Container Instance. Choose whether to mount NAS storage. No Image You can choose from public images (including base images and application images) or private images, depending on your needs. - Yes Other Settings Supports configuring environment variables (key–value pairs), and enables auto-shutdown and auto-release for the Cloud Container Instance. - No
-
-
After configuring the instance parameters, choose "Create Now". In the confirmation dialog box, review the configured parameters and choose "Confirm" to complete the creation of the Cloud Container Instance.
You can view the created instances on the [Computing / Cloud Container Instance] page. When the instance status is "Running", the instance has been created successfully and is ready for use.
Step 2: Deploy the Model
-
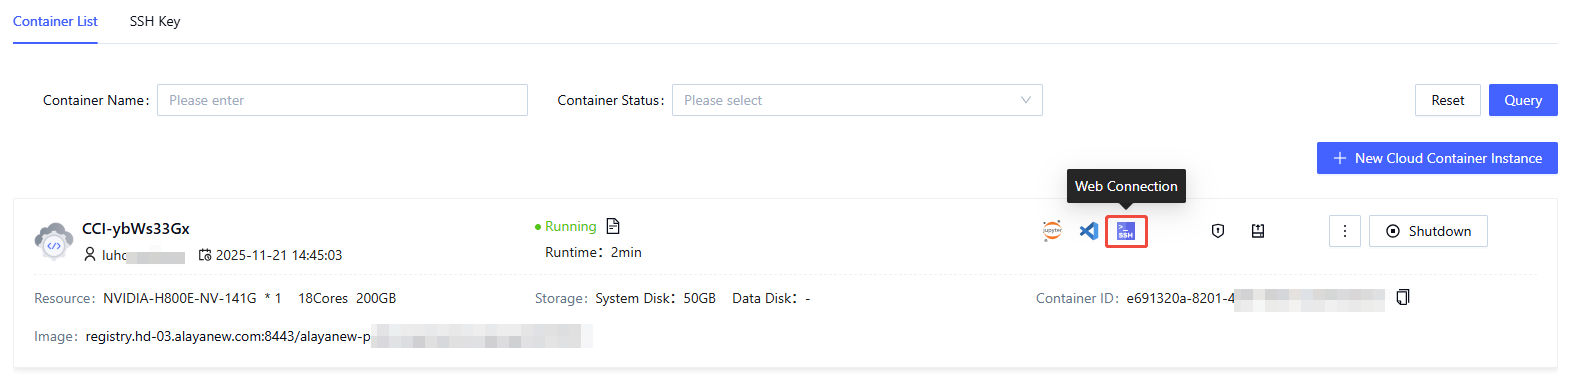
On the "Cloud Container Instance" page, open the "Container List" tab and locate the target instance. Choose the Web Connect icon on the right.
-
Run the following command to install vLLM:
pip install vllm -
Run the following commands to install ModelScope and download the model:
pip install modelscope
##Download using the CLI
modelscope download --model baichuan-inc/Baichuan2-7B-Chat --local_dir '/root/model/' -
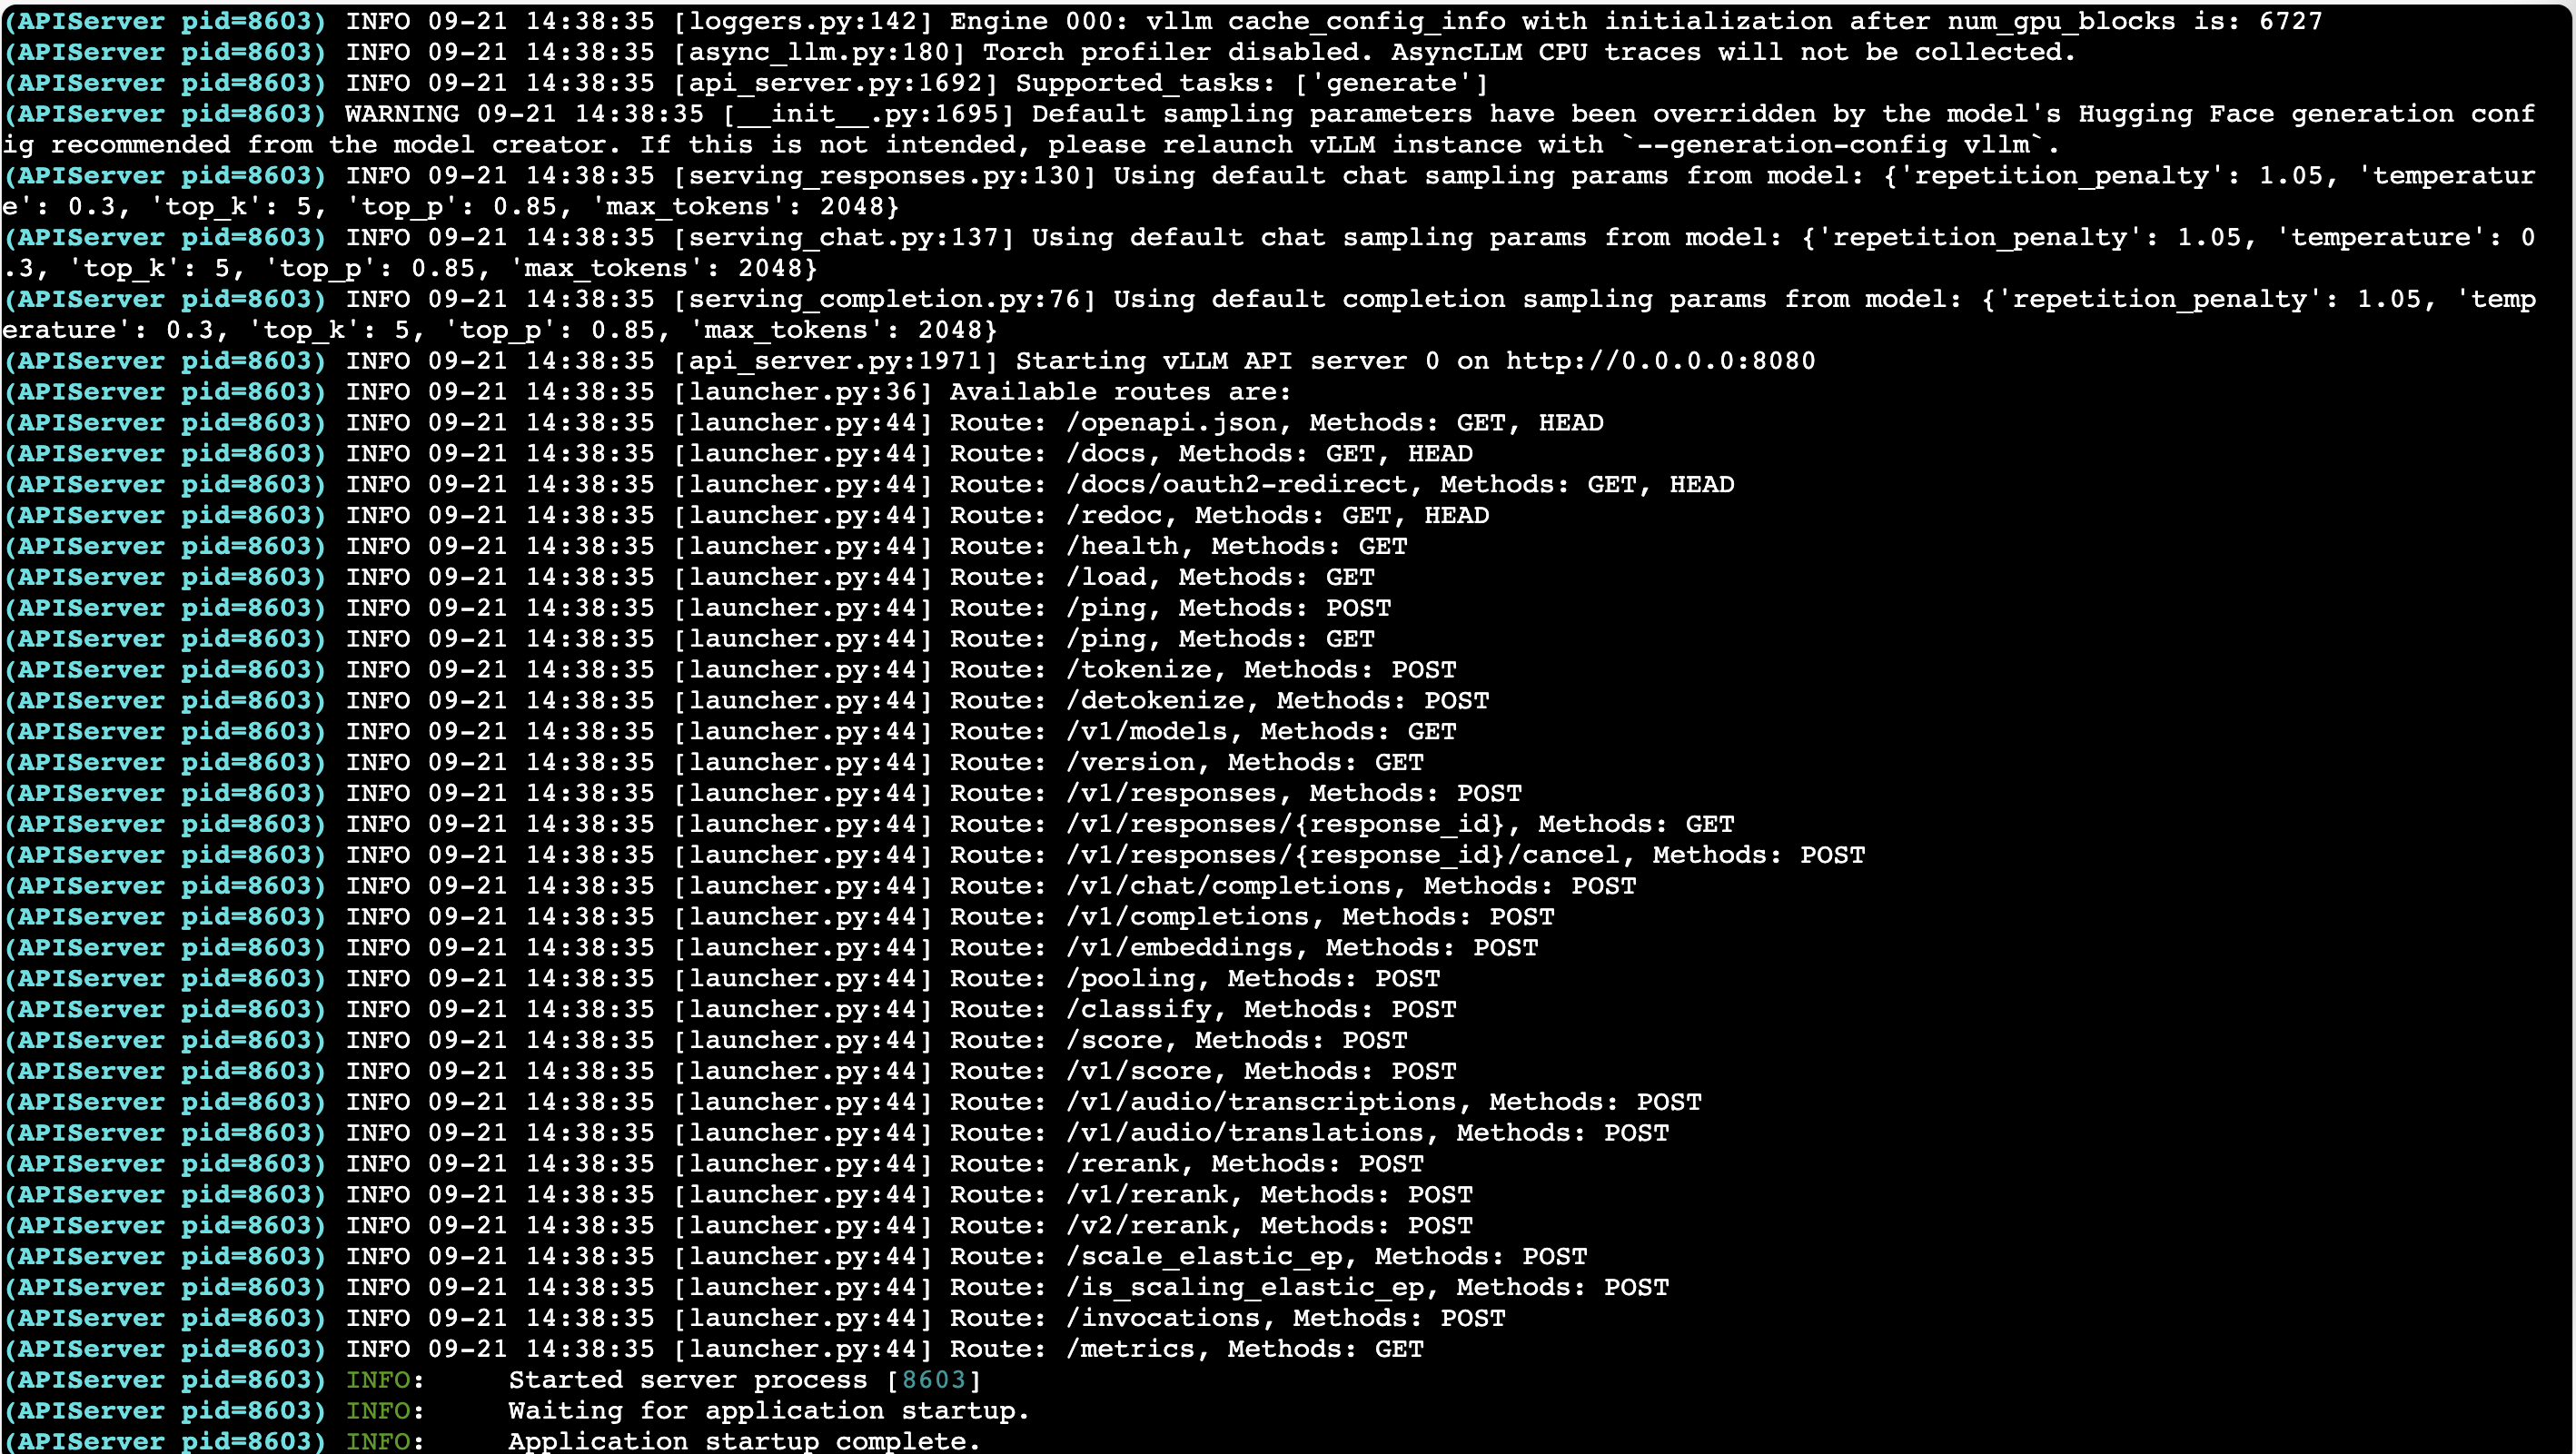
Run the following command to start the model inference service:
python3 -m vllm.entrypoints.openai.api_server \
   --model /root/model/  \
   --host 0.0.0.0 \
   --port 8080 \
   --dtype auto \
--trust-remote-codewarningThe
--modelparameter specifies the path to the model. Update this path based on the directory where you downloaded the model in the previous step.When output similar to the following appears, the model inference service has started successfully.
-
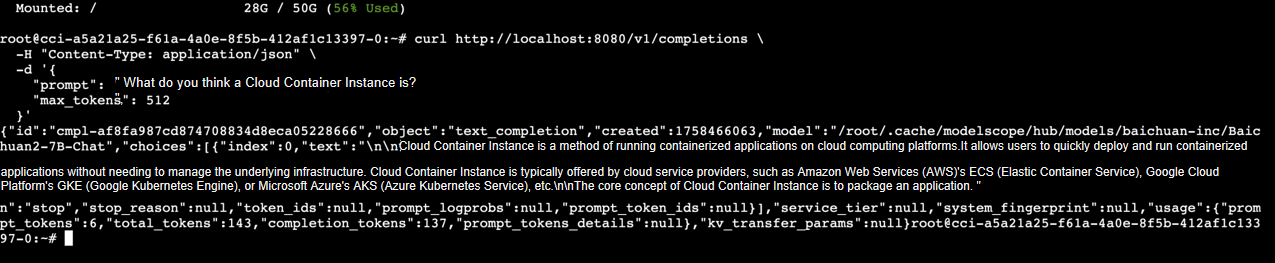
You can reconnect through Web Connect and run the following command to invoke the model:
curl http://localhost:8080/v1/completions \
-H "Content-Type: application/json" \
-d '{
   "prompt": "What do you think a Cloud Container Instance is?",
   "max_tokens": 512
}'