VS Code over SSH
Use the VS Code Remote-SSH extension to develop directly inside a container running on VKS
VS Code is Microsoft's lightweight, cross-platform code editor. This tutorial connects VS Code over SSH to a container in VKS for direct development and debugging.
Prerequisites
kubectlinstalled- An Alaya NeW VKS cluster provisioned
Tutorial files
| File | Purpose |
|---|---|
id_rsa.pub | SSH public key from ssh-keygen, for password-less login |
credentials | aws config file for object-storage access |
Dockerfile | image build file |
deployment.yaml | Deployment resource that drives Pod lifecycle |
credentials
# example credentials file
[default]
aws_access_key_id = [aws_access_key_id]      # from your object-storage provisioning SMS
aws_secret_access_key = [aws_secret_access_key]  # from your object-storage provisioning SMS
SSH keypair
ssh-keygen
cd /root/.ssh
lsNote: Copy
id_rsa.pubnext to your Dockerfile.
Dockerfile
Built on PyTorch base image with:
- Common tooling and SSH server
- A non-root
devuser - AWS CLI for object-storage
- openssh-server with key-based login enabled
- Port 22 exposed, sshd as the entrypoint
FROM pytorch/pytorch:2.5.1-cuda12.4-cudnn9-devel

RUN apt-get update && apt-get install -y \
    curl unzip openssh-server sudo vim nano git tmux wget \
    screen tree htop ncdu git-lfs plocate \
    && apt-get clean

RUN curl "https://awscli.amazonaws.com/awscli-exe-linux-x86_64.zip" -o "awscliv2.zip" \
    && unzip awscliv2.zip && ./aws/install && rm -rf awscliv2.zip aws/

RUN mkdir /var/run/sshd
RUN echo 'root:root' | chpasswd
RUN useradd -m -s /bin/bash dev && echo 'dev:dev' | chpasswd
RUN usermod -aG sudo dev

RUN echo "export PATH=/usr/local/nvidia/bin:/usr/local/cuda/bin:/usr/local/sbin:/usr/local/bin:/usr/sbin:/usr/bin:/sbin:/bin" >> /home/dev/.bashrc
RUN echo "export AWS_ENDPOINT_URL_S3=http://dingofs.hdd.mas.zetyun.cn:8081" >> /home/dev/.bashrc

COPY id_rsa.pub /home/dev/.ssh/authorized_keys
COPY credentials /home/dev/.aws/credentials
RUN chown -R dev:dev /home/dev

RUN sed -i 's/^#PermitRootLogin prohibit-password/PermitRootLogin yes/' /etc/ssh/sshd_config
RUN sed -i 's/^#PasswordAuthentication yes/PasswordAuthentication yes/' /etc/ssh/sshd_config

EXPOSE 22
CMD ["/usr/sbin/sshd", "-D"]
deployment.yaml
apiVersion: apps/v1
kind: Deployment
metadata:
  name: dev-deploy
  namespace: dev
spec:
  replicas: 1
  selector:
    matchLabels: { app: dev }
  template:
    metadata:
      labels: { app: dev }
    spec:
      restartPolicy: Always
      containers:
        - name: coding-dev-container
          image: <registry>/pytorch/pytorch:2.5.1-cuda12.4-cudnn9-devel-ssh-1.0
          resources:
            requests: { memory: "400G", cpu: "26", nvidia.com/gpu-h800: 2 }
            limits:   { memory: "400G", cpu: "26", nvidia.com/gpu-h800: 2 }
          ports:
            - containerPort: 22
              name: ssh-port
              protocol: TCP
          volumeMounts:
            - { name: workspace, mountPath: "/workspace" }
            - { name: workspace, mountPath: "/models" }
      imagePullSecrets:
        - name: harbor-secret
      volumes:
        - name: workspace
          persistentVolumeClaim:
            claimName: pvc-capacity-userdata
Steps
1. Build & push the image
Username / password come from the registry provisioning SMS. Registry URL = host / project.
docker login <registry> -u [user] -p [passwd]
docker pull pytorch/pytorch:2.5.1-cuda12.4-cudnn9-devel
docker build --platform=linux/amd64 \
  -t pytorch/pytorch:2.5.1-cuda12.4-cudnn9-devel-ssh-1.0 \
  -f /path/to/Dockerfile .
docker tag  pytorch/pytorch:2.5.1-cuda12.4-cudnn9-devel-ssh-1.0 \
            <registry>/pytorch/pytorch:2.5.1-cuda12.4-cudnn9-devel-ssh-1.0
docker push <registry>/pytorch/pytorch:2.5.1-cuda12.4-cudnn9-devel-ssh-1.0
2. Deploy the K8s resources
export KUBECONFIG="/path/to/kubeconfig"

kubectl create namespace dev

kubectl create secret docker-registry harbor-secret \
  --docker-server=registry.hd-01.alayanew.com:8443 \
  --docker-username=[user] \
  --docker-password=[password] \
  --docker-email=[email] \
  --namespace dev

kubectl create -f deployment.yaml
kubectl port-forward deployments/dev-deploy 10022:22 -n dev
3. Test SSH login
ssh dev@127.0.0.1 -p 10022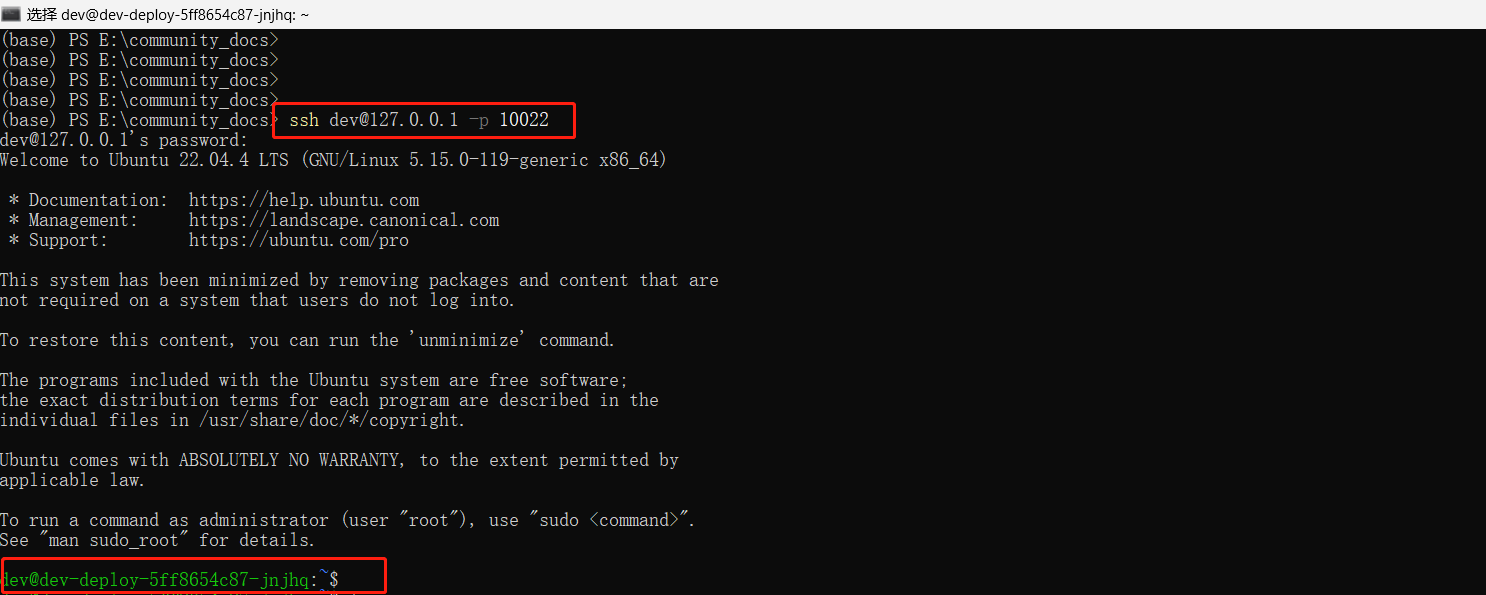
4. Configure VS Code
Edit ~/.ssh/config:
Host dev-pod
HostName 127.0.0.1
Port 10022
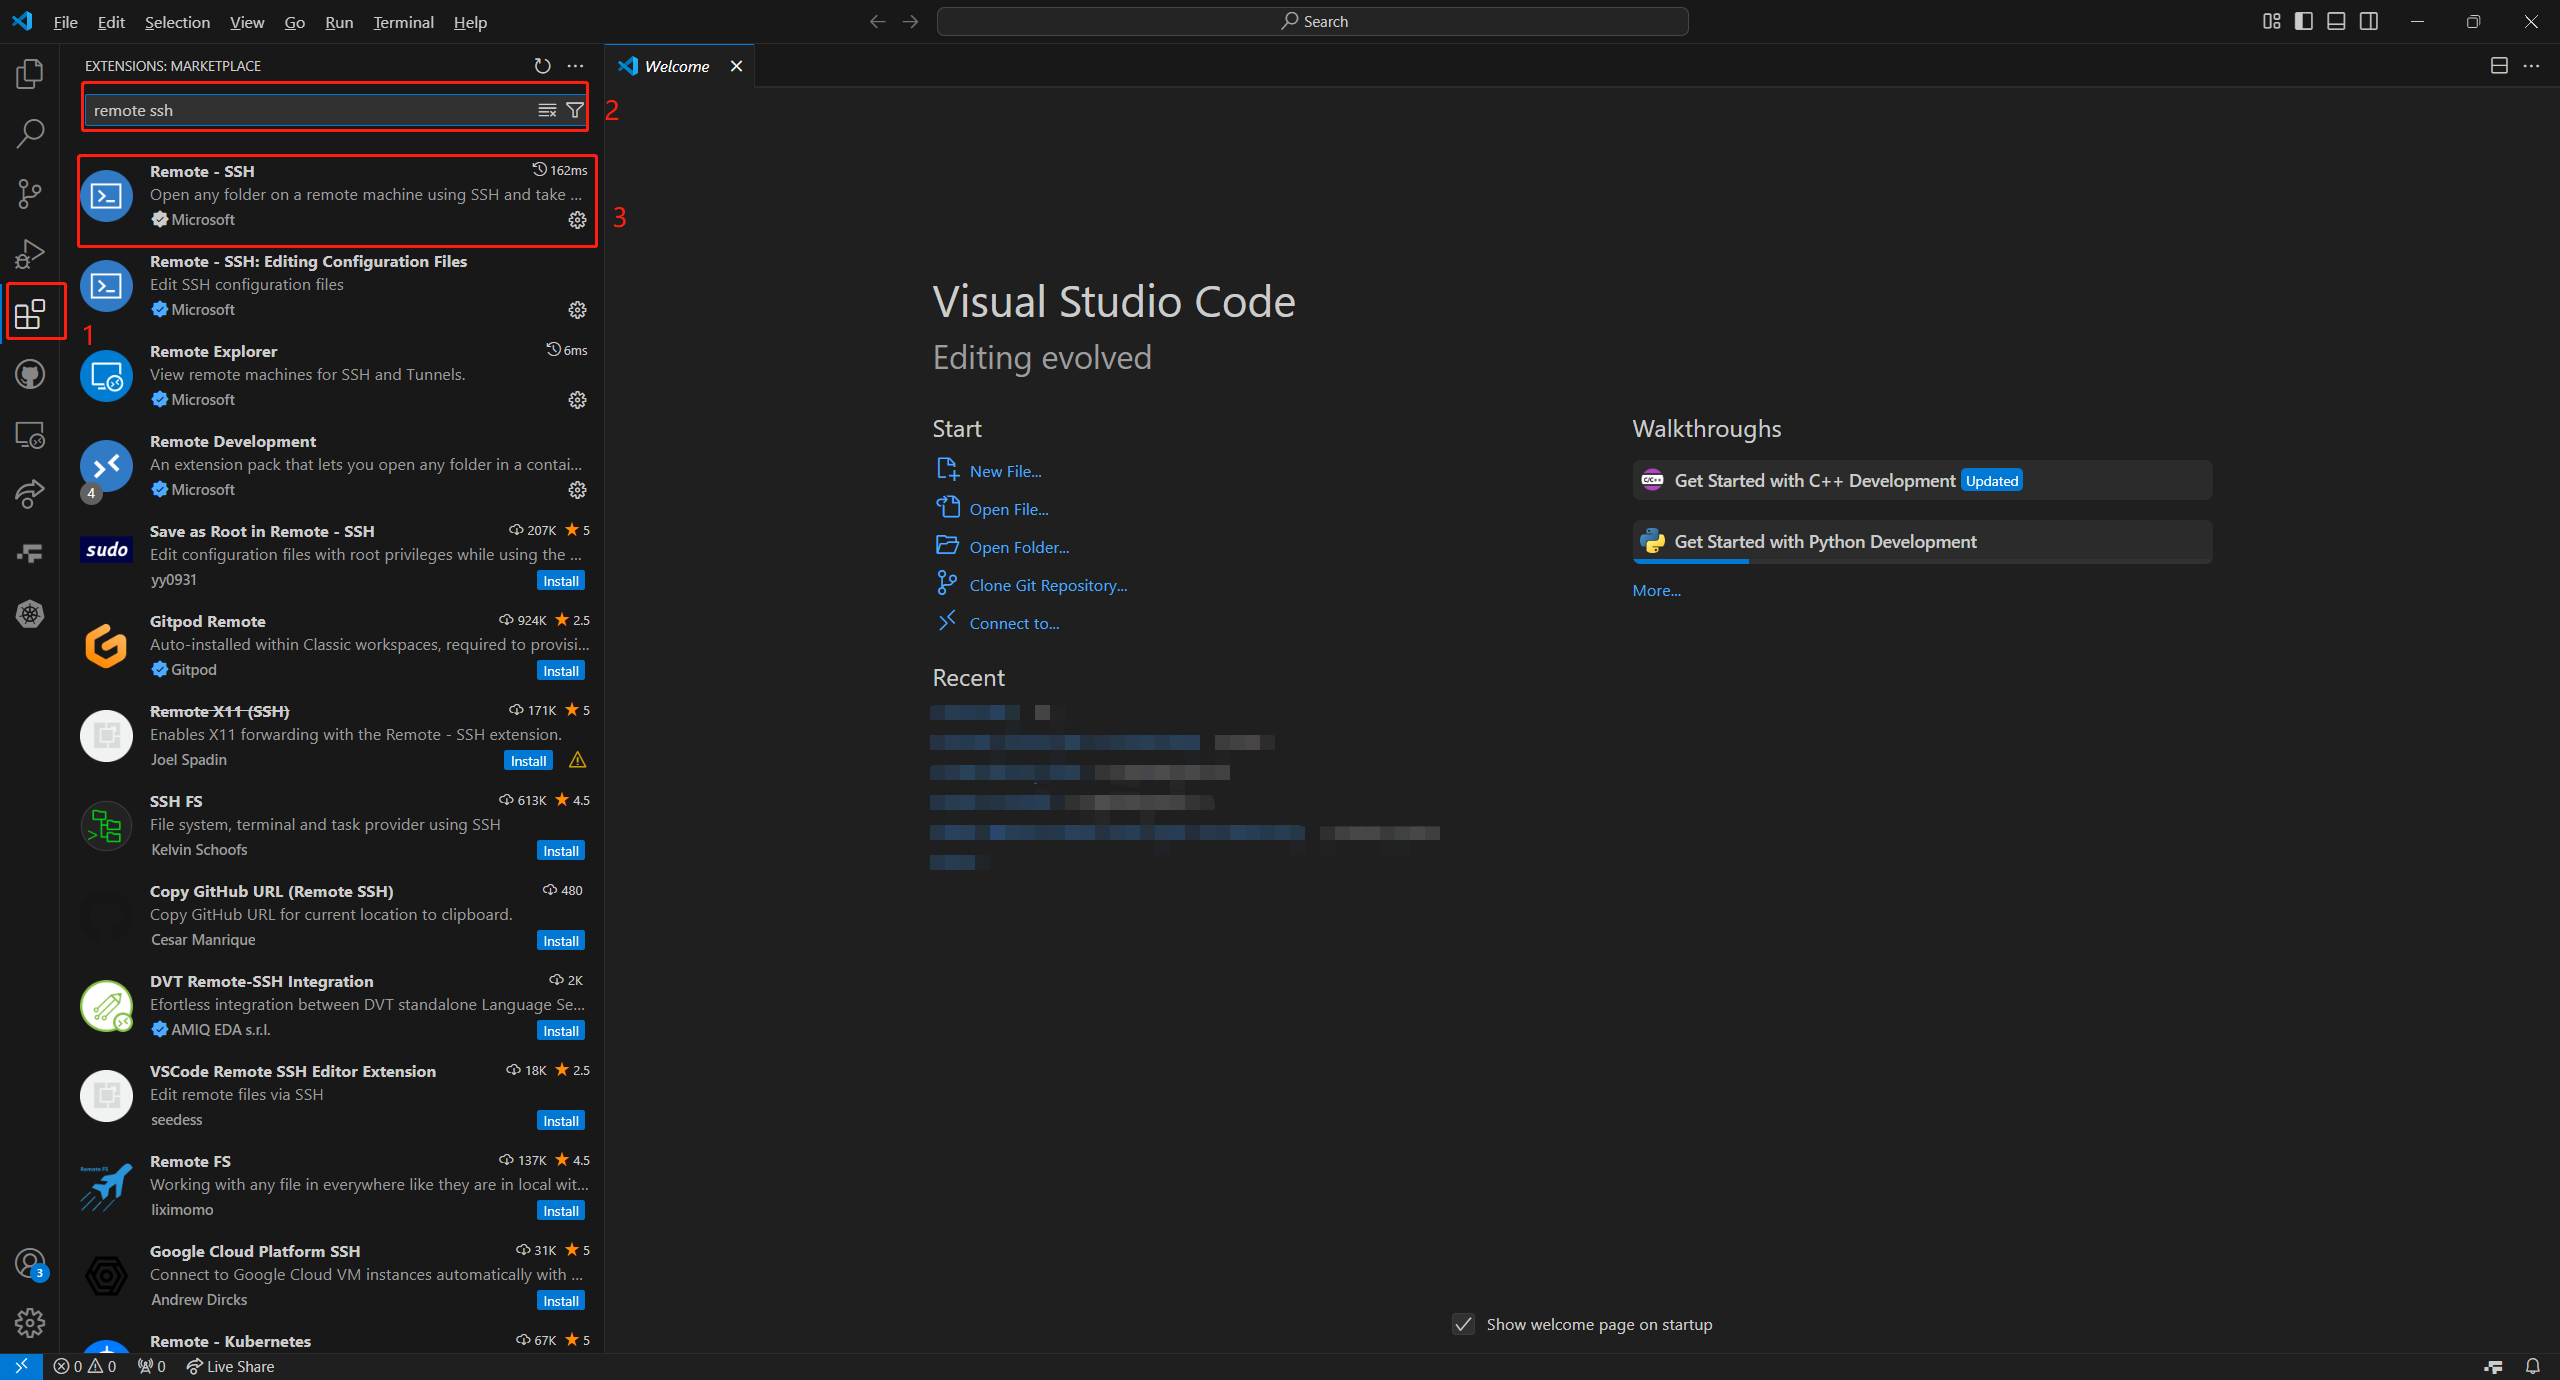
User devInstall the Remote-SSH extension:
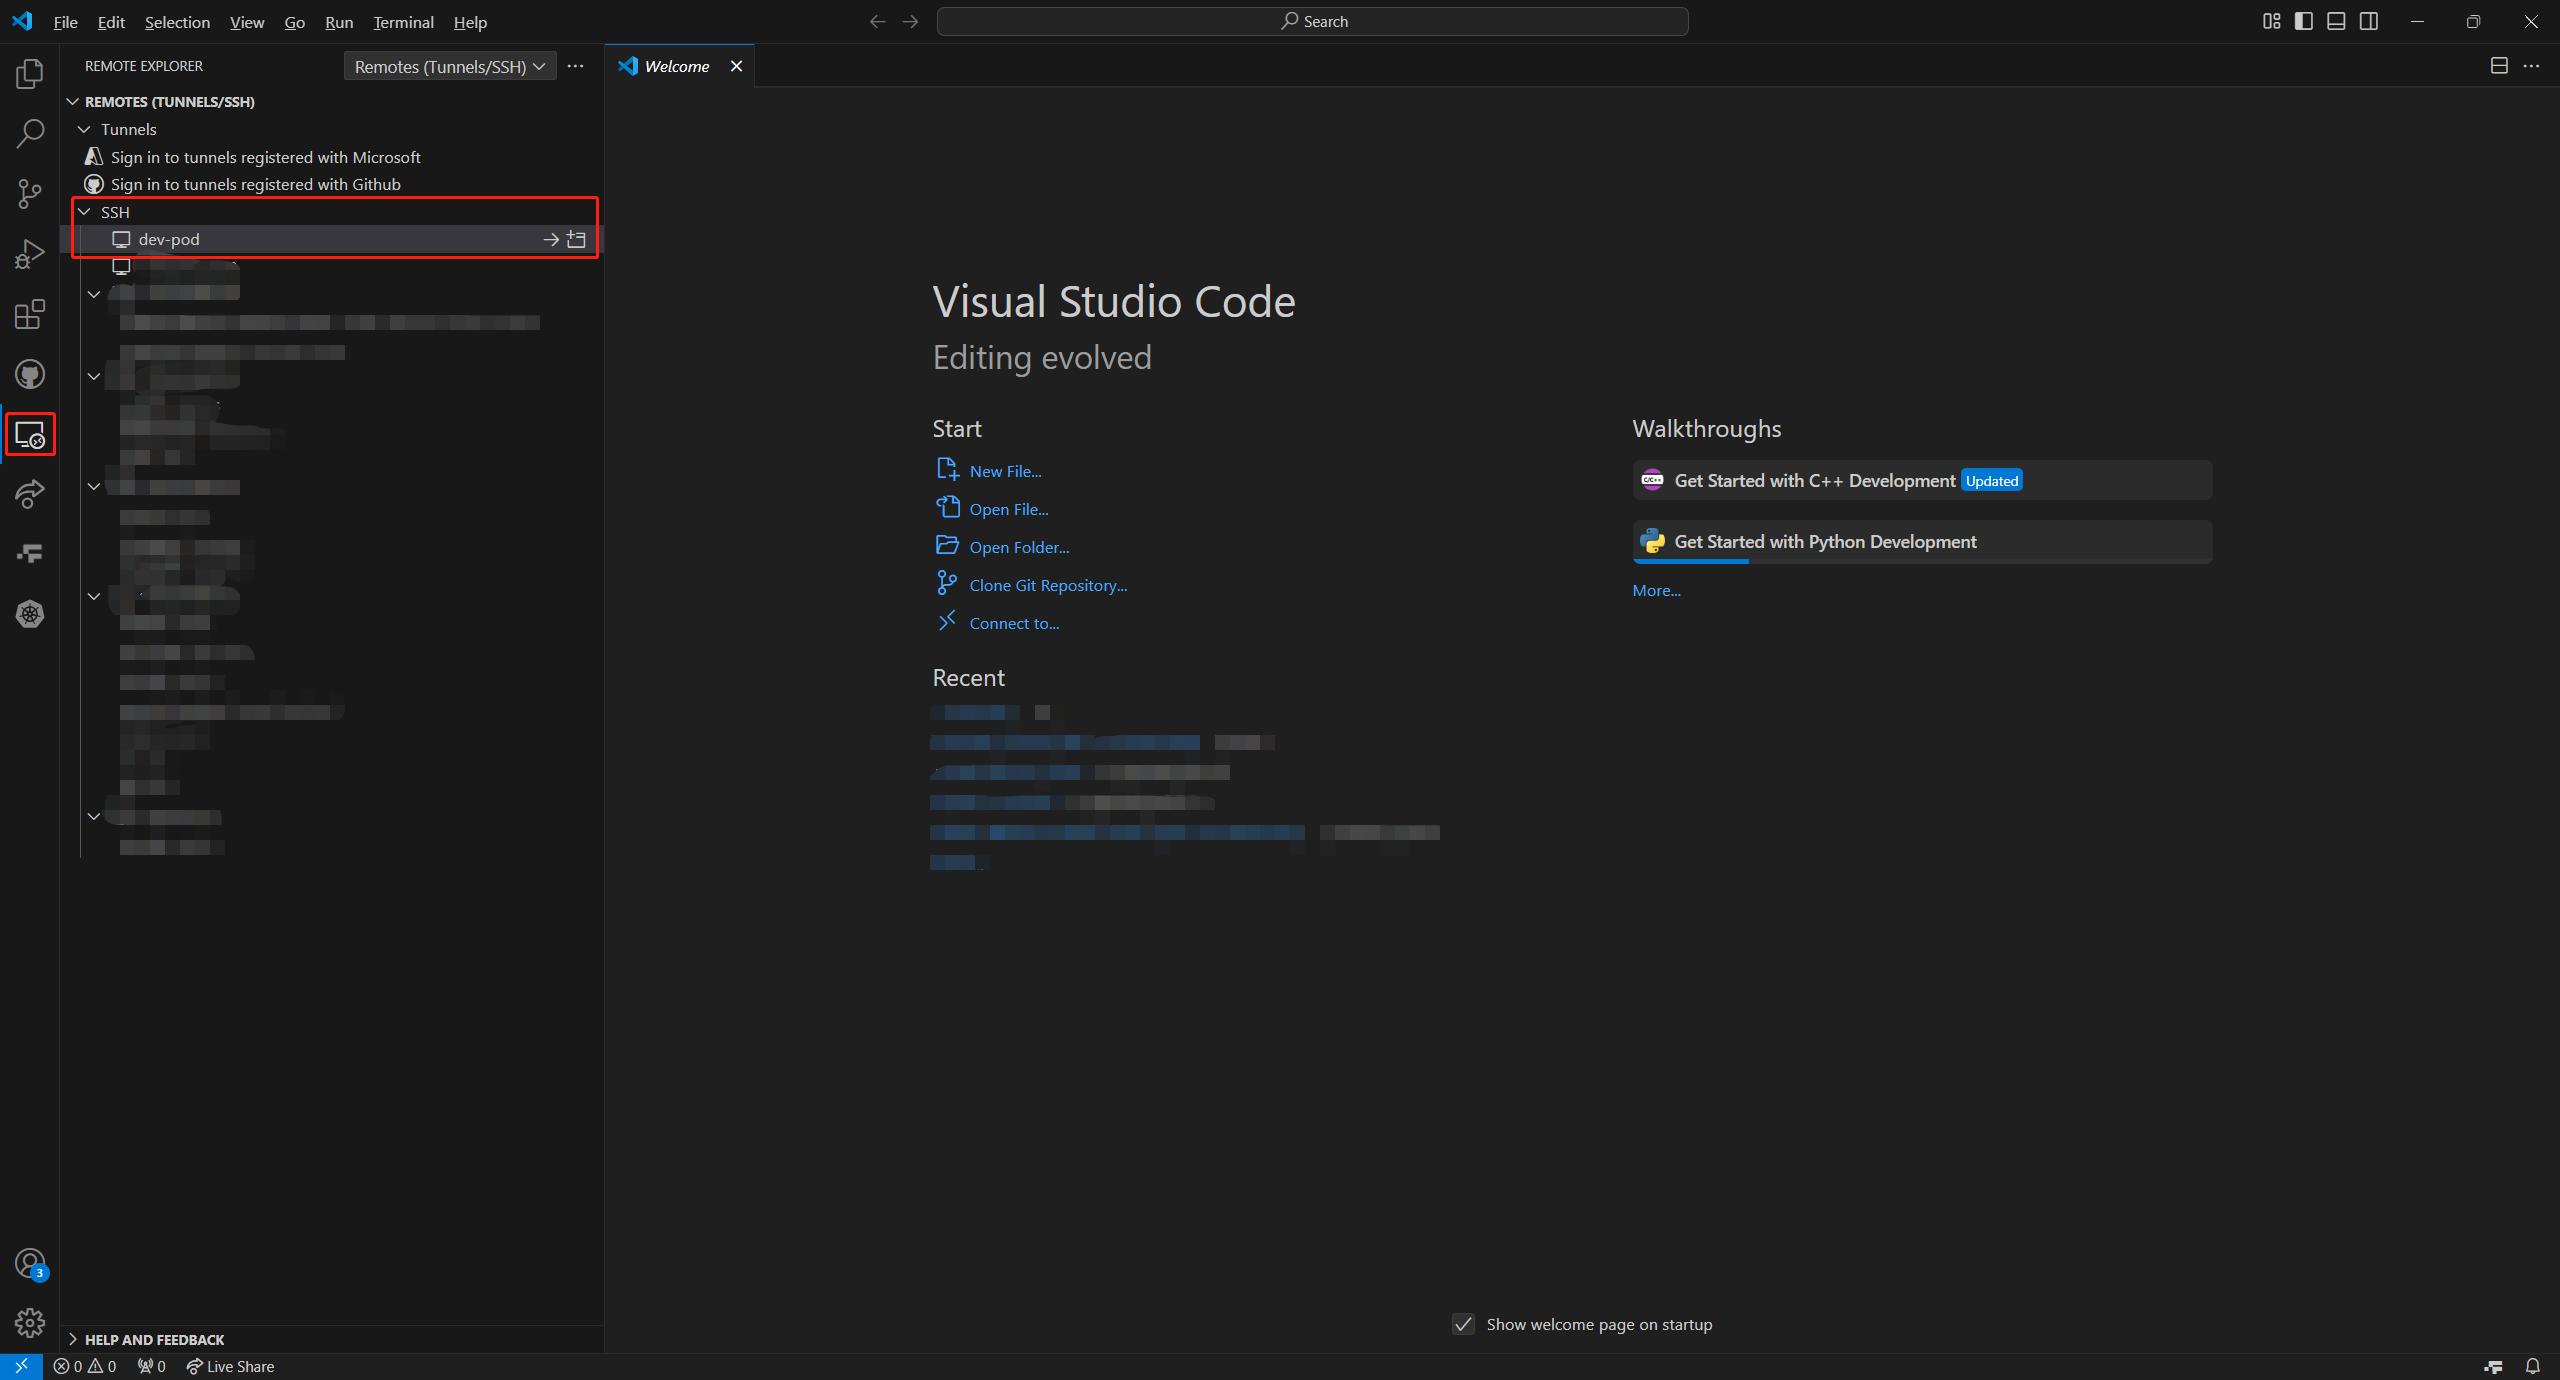
After install:
5. Connect to the Pod and write hello.py
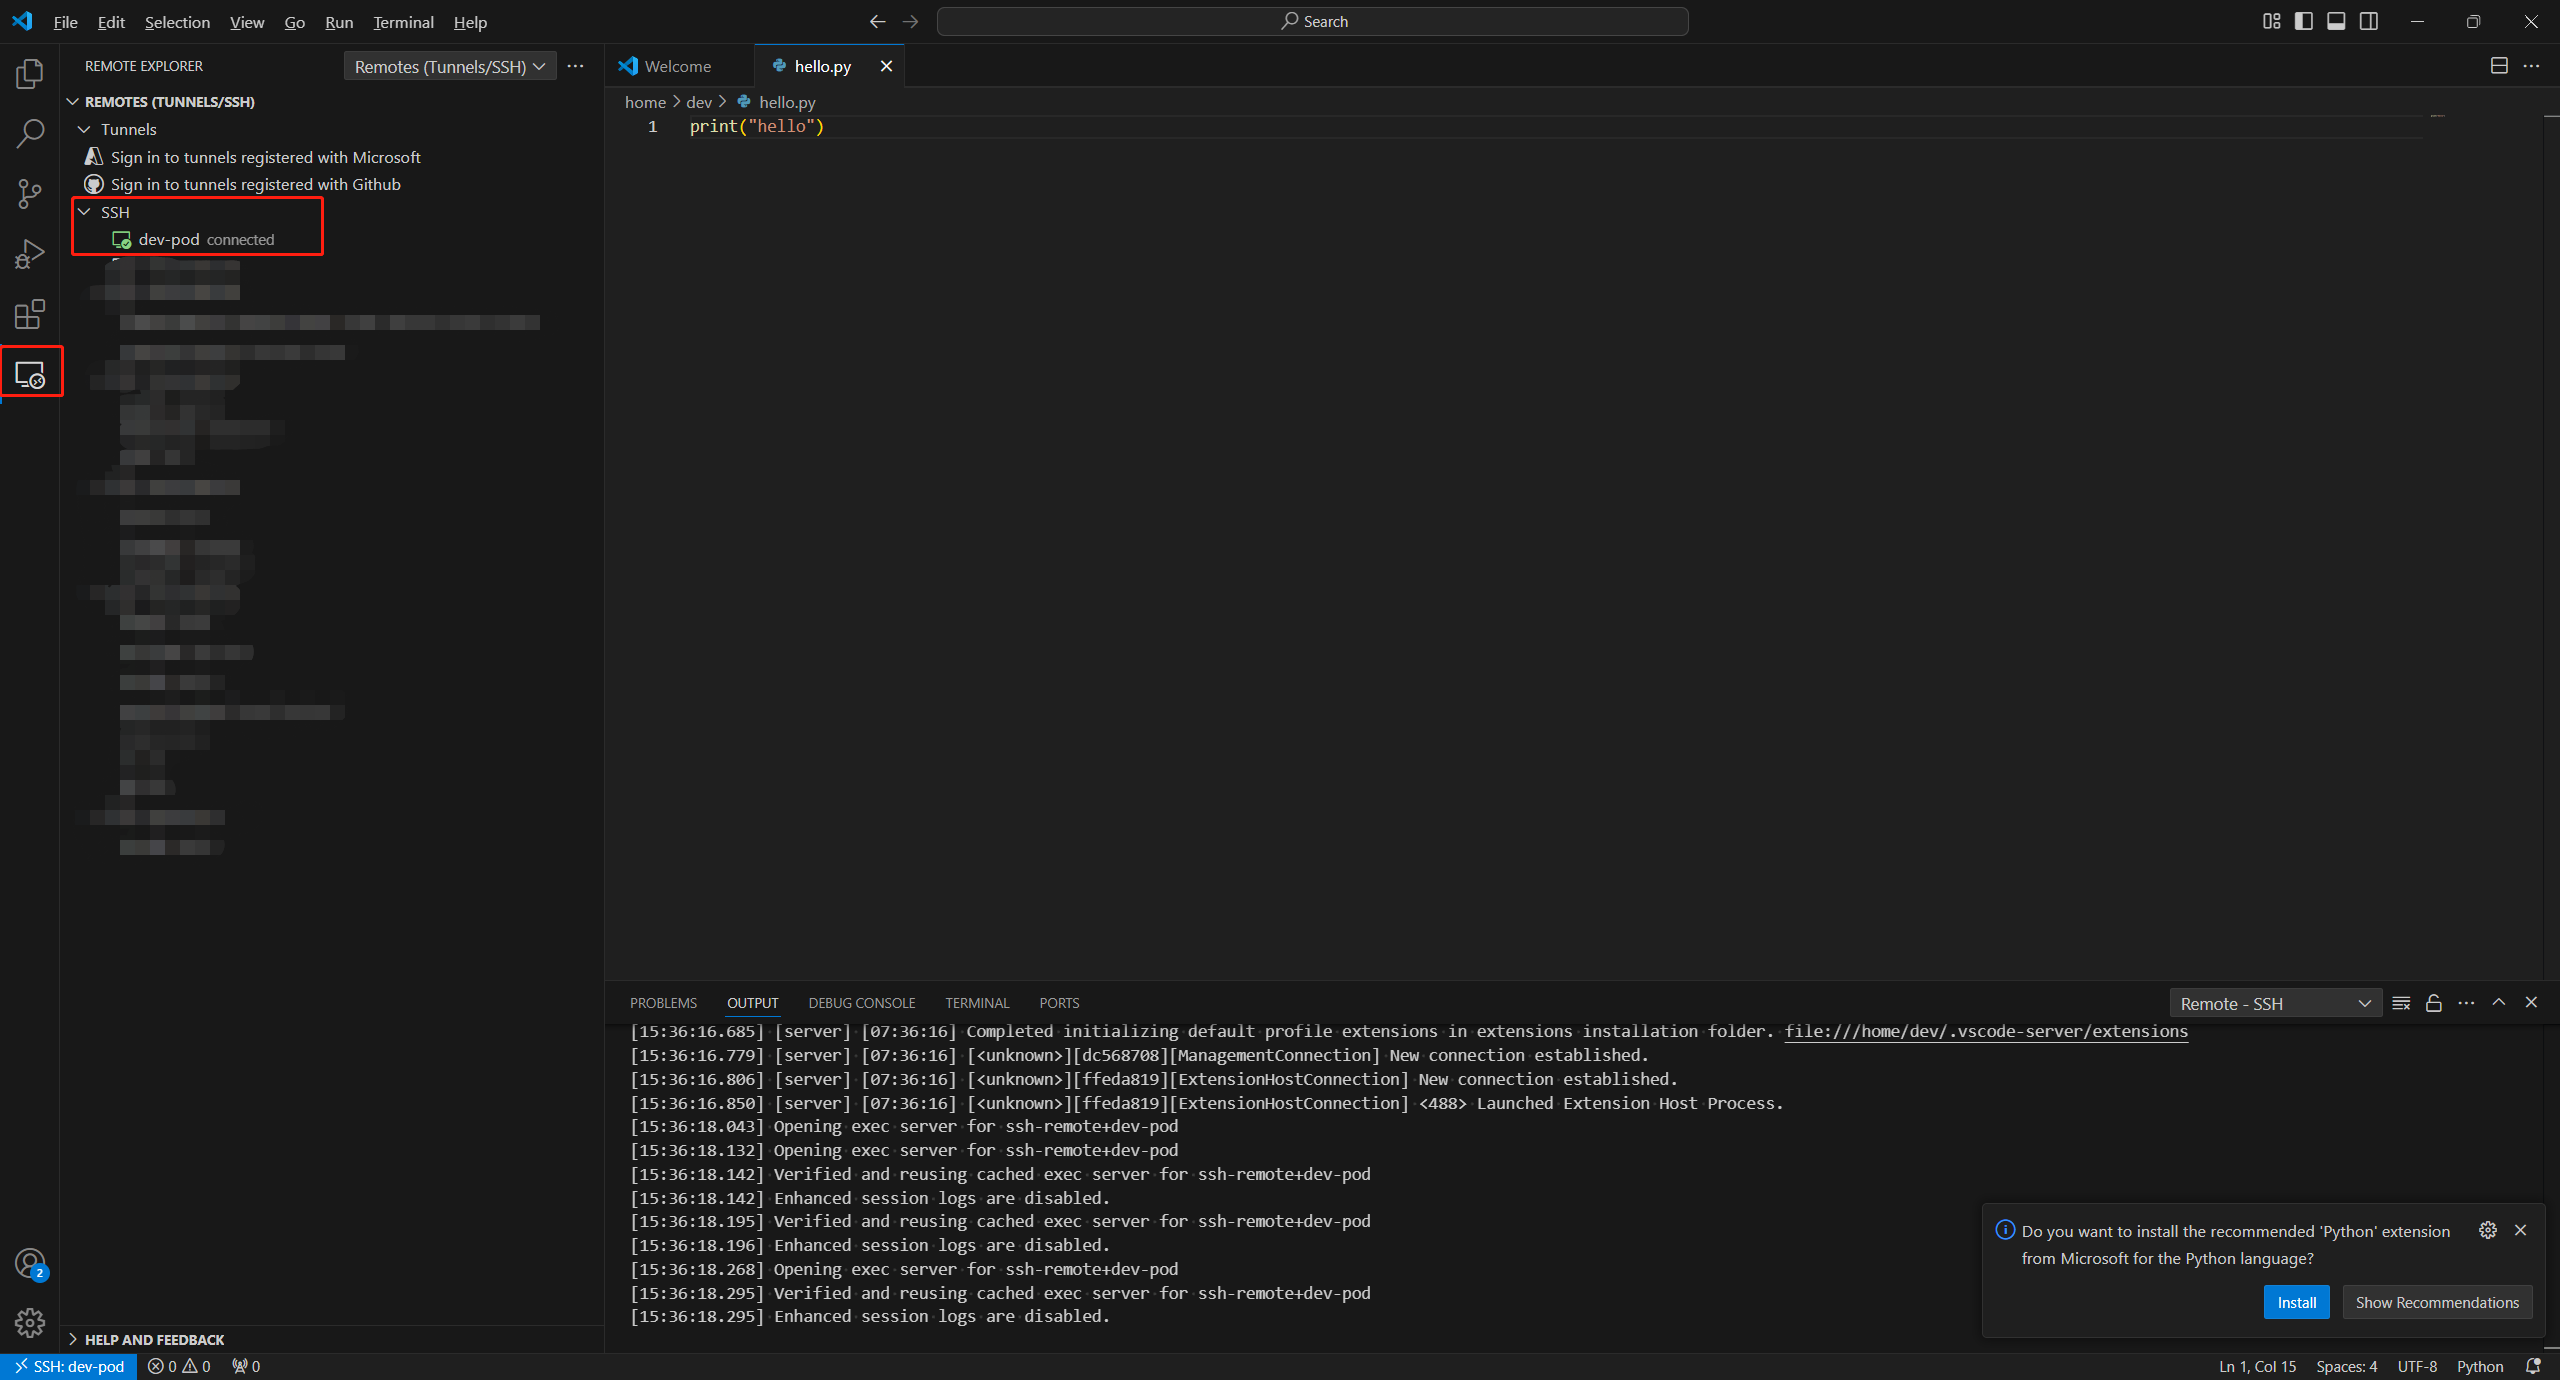
Verify hello.py was created inside the Pod:

Last updated on
Was this page helpful?